Working with the Symfony console component has always been a delightful experience. It makes it super easy to build a console application. You might need one while working with a framework. (Like Symfony or Laravel) Or you might just need to build a standalone console application.
That said, there are differences between building a standalone console application and building one with a framework. The biggest one is the use of dependency injection. Most standalone Symfony console applications that you can find out there don’t use it.
That’s a shame because the Symfony dependency injection component is full of awesome features. For the Ymir console application, I decided to look at how to build a console application using it. It’s made building console applications even better.
A quick overview of the Symfony dependency injection component
Let’s take a brief look at how to use the Symfony dependency injection component before integrating it. Central to the component is the service container. To build the service container, you need to use the ContainerBuilder class.
Now, you can manually build the container by defining parameters and services yourself. That said, it’s much more common to use the Symfony config component to do it. The component lets you use YAML (with the help of the YAML component, XML or plain PHP files to configure the container.
This is what we’re trying to do in this article. We want to configure a dependency injection container using a YAML file. (Feel free to use the file type that you prefer!) And then we want to compile the container and start the application using it.
$container->compile();

$container->get(Application::class)->run();
Above is all the code that you’d need to start the console application. No need to add any commands or deal with any dependencies. The configured container would have everything wired and ready to go for you.
Composer dependencies
With this small intro out of the way, Let’s start with Composer dependencies that we’ll need for this console application. We’ve mentioned them all already.
{
    "require": {
        "symfony/config": "^4.4",
        "symfony/console": "^4.4",
        "symfony/dependency-injection": "^4.4",
        "symfony/yaml": "^4.4"
    }
}
Above is the relevant section of the composer.json file for these dependencies. We need four Symfony components. These are the config, console, dependency injection and YAML components.
As mentioned earlier, the YAML component is optional. If you want to use PHP or XML to define your services, you don’t need it. But for this article, we will use YAML for the services configuration so the dependency is necessary.
Another thing is that we’re going to use version 4.4 of the Symfony components. This is current long-term support version of Symfony. So the code that you’ll see will be good until the end of 2023. (And possibly longer.)
Creating the executable
Once the dependencies added and downloaded, we can start working on the console application. The primary interaction point with it is an executable file. Below is the base executable file that we’re going to use for our console application:
#!/usr/bin/env php
<?php

require __DIR__.'/vendor/autoload.php';
Our PHP script starts with #! which is known as a hashbang. A hashbang tells a Unix-like operating system that it should interpret a text file as an executable file. (You also need to make it executable using chmod +x.) Following the hashbang is the interpreter that we want Unix to use.
Here, we want that interpreter to be PHP. We could use /usr/bin/php, but instead we used /usr/bin/env php. The reason to use env is that the script will not work if PHP isn't in the /usr/bin directory. env will search for the php executable and then launch it.
env is also useful if you have multiple PHP interpreters installed. This is especially common in local development. In that scenario, env will always pick the default PHP interpreter that you've chosen.
After the hashbang, the rest of our executable looks like a regular PHP script. We have the <?php opening tag. We then require the autoload file generated by Composer.
Adding the container
Now that we have our base executable, the next step is to add the dependency injection container. We want to configure and compile the container in the executable before running the console application. Let's look at what that looks like.
#!/usr/bin/env php
load(__DIR__.'/config/services.yml');

$container->compile();
We first start by instantiating a ContainerBuilder object. We then use that ContainerBuilder object to create a YamlFileLoader object. This is the configuration loader that we’re going to use to configure our dependency injection container.
The YamlFileLoader object will load the services.yml file found in the config directory. The directory and file names are a personal choice. You can name the YAML file whatever you want and put it wherever you want really.
After loading it, we call the compiler method. This compiles the ContainerBuilder object and turns it into a Container object. You cannot use the container until you’ve done this.
Adding the base dependency injection container configuration file
Now, you could also load multiple configuration files if you wanted. But for this article, we’re just going to use services.yml. Here’s what it contains so far.
services:
  _defaults:
    autowire: true
The _defaults section is where you define the default configuration options for the services in your container. The most important one is autowire which you want to set to true. This is what turns on the amazing autowiring feature.
When autowire is true, the container will take over the handling of the dependencies for your services. It’ll read the type hints of the constructor of each service. It’ll then pass it the right dependencies when it creates the object the first time. (It’s a really magical thing!)
Creating the Application class
Now that we have our compiled Container object, we can move on to our base Application class. You can see it below extending the Symfony Application class. We renamed it to BaseApplication to prevent a naming conflict.
namespace Console;

use Symfony\Component\Console\Application as BaseApplication;

class Application extends BaseApplication
{
    // ...
}
Empty like this, a console application doesn’t do much. If you ran the list command for it, you’d get this:
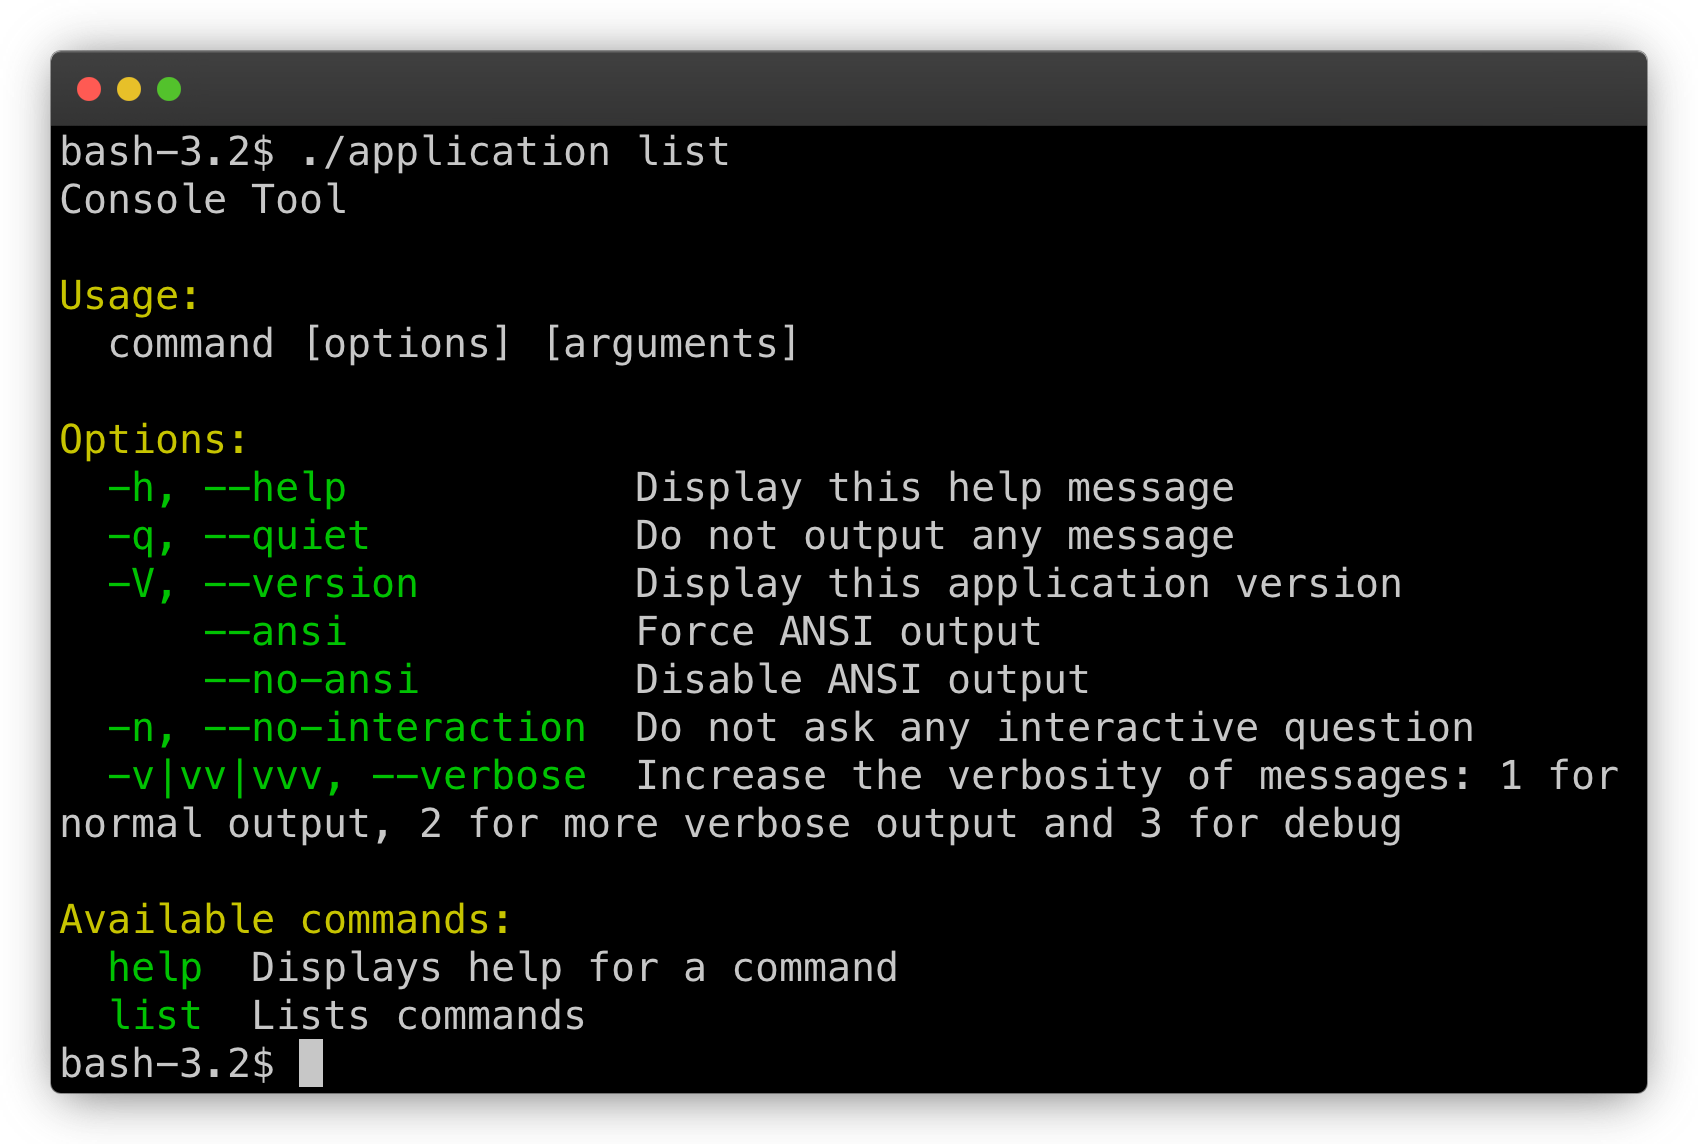
There are only two available commands: help and list. This is how all Symfony console applications start out with. So what we really need to do now is add commands.
Adding commands to the application
Adding commands to an application is straightforward. All that you have to do is call the add method with the Symfony Command object you want to add. In our Application class, this could look something like this:
namespace Console;

use Symfony\Component\Console\Application as BaseApplication;

class Application extends BaseApplication
{
    /**
     * Constructor.
     */
    public function __construct(array $commands = [])
    {
        foreach ($commands as $command) {
            $this->add($command);
        }
    }
}
As you can see above, we added a constructor to the Application class. The constructor has a single parameter called commands. We use it to pass an array of Command objects to the constructor. We then loop through each one and add them using the add method.
Right now, we’d have to supply that array of Command objects to the constructor ourselves. But what we really want is for the dependency injection container to handle all that for us. It should find all the Command objects and pass them to the Application constructor.
Creating a service tag for command objects
To do that, we’re going to use a service tag to identify all our Command objects. We can do that easily using the _instanceof option. Here’s what it looks like in the services.yml file.
services:
  _defaults:
    autowire: true

  _instanceof:
    Symfony\Component\Console\Command\Command:
      tags: ['command']
We added the _instanceof section below the _default one. Under that section, you want to add the fully qualified name of the class or interface that we want to add a tag to. For this, we want to use the fully qualified of the Symfony Command class because it doesn’t have an interface. That fully qualified name is Symfony\Component\Console\Command\Command.
Below that, we have the tags that we want all the Symfony Command objects to have. We just have one for this. It’s command.
Using the service tag
Next, we need to configure the dependency injection container. Right now, it doesn’t know that we want it to pass all the Command objects to the Application class constructor. To tell it to use our service tag, we have to modify the services.yml file like so:
services:
  _defaults:
    autowire: true

  _instanceof:
    Symfony\Component\Console\Command\Command:
      tags: ['command']

  Console\Application:
    public: true
    arguments:
      - !tagged command
Above you can see that we added the fully qualified name of the Application class as a new section. Below, we added public: true so that the application would be publicly available. Next, we added the arguments section which lets you define the arguments to pass to a class constructor. We then used !tagged command as the first argument.
At this point, if you try to run your console application, you’ll get an error like this:
PHP Fatal error: Uncaught TypeError: Argument 1 passed to Console\Application::__construct() must be of the type array, object given
That’s because the dependency injection container doesn’t pass an array to our Application class constructor. It passes an object implementing the Traversable interface. This is a built-in PHP interface that lets an object work with a foreach loop.
namespace Console;

use Symfony\Component\Console\Application as BaseApplication;

class Application extends BaseApplication
{
    /**
     * Constructor.
     */
    public function __construct(iterable $commands = [])
    {
        foreach ($commands as $command) {
            $this->add($command);
        }
    }
}
To solve this issue, we need to change the type hint of the Application class constructor. If you want, you can use the Traversable interface. A better option is the iterable pseudo-type which is what the code above uses. But regardless of the one you use, once you update the constructor, the error will be gone.
Adding the application to the executable
At this point, you have everything that you need to run a console application using the dependency injection container. We just need to update the executable so we get the Application object from the container. You can see that below.
#!/usr/bin/env php
load(__DIR__.'/config/services.yml');

$container->compile();

exit($container->get(Application::class)->run());
At the top, we added the use statement to import the Application class. But really, what we care about at the bottom. It’s the call to the exit function.
The exit function just terminated the PHP script using the given status. The status just comes from getting the Application object from the container. And then we call the run method which runs the console application and terminates.
To see a fully working version of a console application using this technique, I invite you to look at the code of the Ymir console application on GitHub.