Writing my first book “Discover object-oriented programming using WordPress“. was quite a journey. I discussed some of it when I went over how I marketed it. But that was only a small part of that journey.
By far, the largest part and the biggest challenge was the process of writing a book. Writing a book can be an intimidating project. It definitely was for me since it was my first time writing one.
But one reason I found the whole process so daunting was because I didn’t know what tools to use to write a book. There are a lot of them out there! You have professional applications like Scrivener which Nathan Barry used to write “Authority“. You also have a variety of publishing platform such as Leanpub.
Evaluating all these tools was pretty overwhelming for me. All that I knew for sure was that I wanted to write the book in markdown. This isn’t a common way to write a book, but it’s something we use a lot as developers. (It’s also how I write articles.)
With Authority, Nathan Barry really sold me the idea that I should control the whole process of publishing a book. So not only did I want to write my book in markdown, but I also wanted to handle all the book’s design, marketing and sale. For me, that was all part of the book writing process.
Moving on
After a bunch of fruitless research, I decided that I didn’t need to figure this out right now. I just started writing the book with Draft. This is the tool I’ve been using to write my articles (including this one!) in markdown for the last few years.
Draft is a great tool to write articles in markdown. But it doesn’t really scale well after 5,000 words. (I write some pretty long articles!) It also doesn’t have much to help you organize a book.
So after a while, I moved everything to a git repository and started using Sublime Text to do my writing. This was a good enough setup for me. I just broke chapters out into files and rearranged things as I went along.
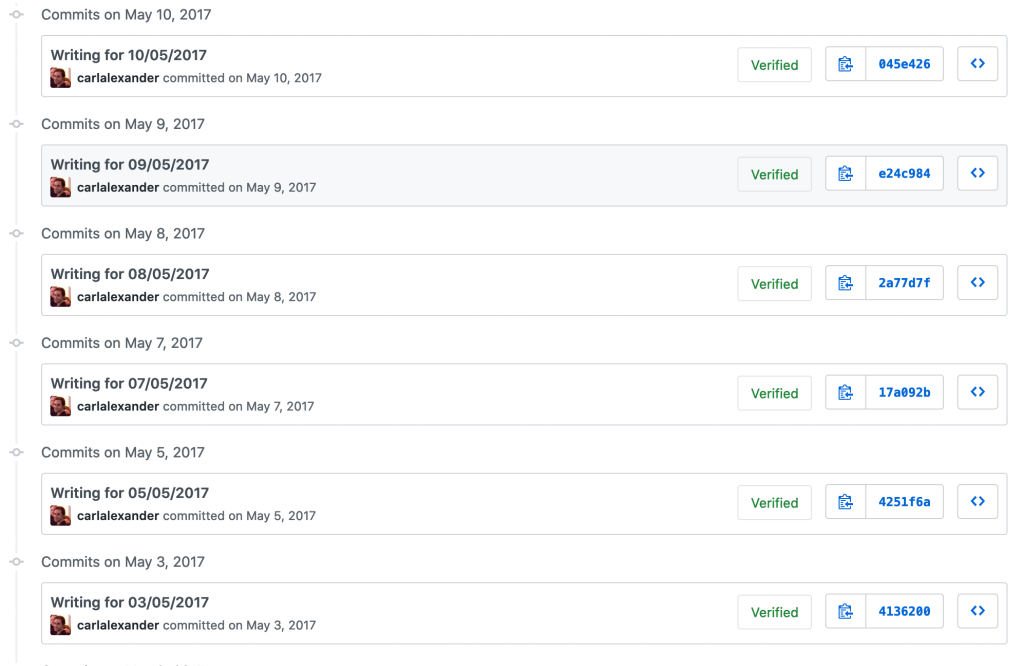
The added benefit of using a git repository is that you can use it to help maintain your book writing habit. Whenever I worked on the book, I would commit all the work I did for the day. This helped me feel like I was making some daily progress towards finishing the book.
By the end of 2017, I’d finished writing the book. I still had no idea how to convert what I’d written into a good-looking PDF. I’d been playing with Pandoc, but I wasn’t happy at all with the quality of the PDF it was generating.
Reaching out to Adam Wathan
As this was all going on, Adam Wathan released his book “Refactoring to collections” to great success. It’s an excellent book and inspired me to write an article and give a talk on functional programming. But besides being an outstanding book, it also looked exactly how I’d want a book to look.
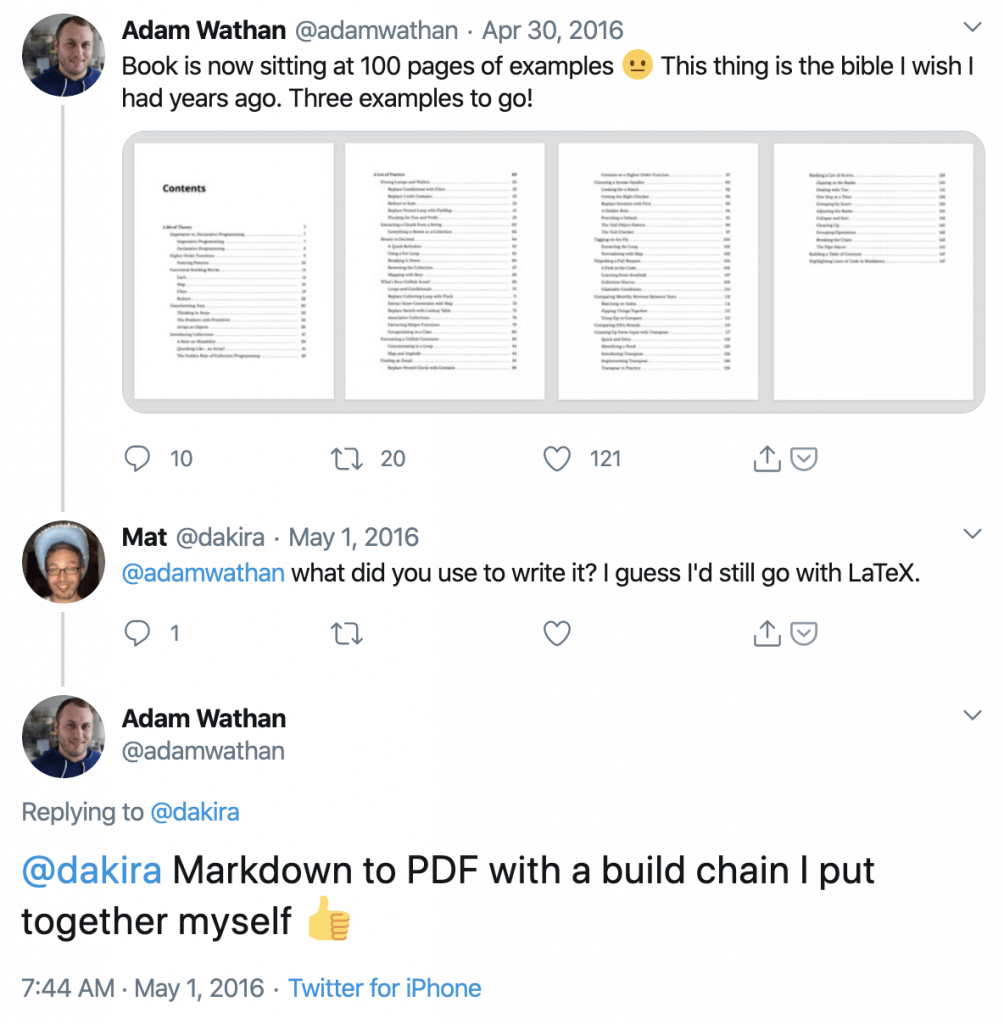
I became aware during 2016 that Adam had also written his book and markdown. And, in very typical Adam fashion, he’d built a custom solution for turning it into PDF. I spent most of 2016 hoping he’d write about how he’d done it, but he never ended up doing it.
I eventually reached out to him because we’re both in MegaMakers. He gave me access to the tool he’d built for his book. I used it as a base and then built my own.
The rest of the article will focus on how this markdown to PDF application worked. I don’t take any credit for any of this, as Adam did most of the original work himself. But this should allow you to follow a similar path as me and Adam if want to.
Building a command-line tool
At its core, what you’re building is a command-line tool. As developers, we use these tools daily so we’re already familiar with them. They also don’t require us to create any user interface. We can just use them to run some custom code that we wrote which is exactly what we’re trying to do!
Me and Adam wrote ours in PHP using a mix of libraries. (Most of them were Symfony Components.) But you can use any language that you’re comfortable in. JavaScript and Python are especially popular for building command-line tools.
Picking a programming language to use is just the first step. Once you’ve done, you’ll also need to find libraries to perform certain tasks. That’s if your programming language doesn’t support doing them already. These tasks are:
- Parsing markdown to HTML
- Crawling the DOM
- Manipulating PDFs
These are the tasks my tool helped me with. They might vary for you. For example, Adam didn’t edit the PDF once his tool generated it.
How do you generate the PDF?
Speaking of PDF generation, you’ll notice that it’s not in the list of libraries. That’s because our tool isn’t going to handle it by itself. Instead, we’re going to use a standalone PDF generation tool to do it and our tool will make a call to it.
Earlier, I mentioned that I’d tried to use Pandoc, and I found it lacking. The tool that Adam used a tool called Prince which I ended using as well. It’s not open source, and it isn’t cheap, but you can try it for free. (It just puts a watermark on the first page.) This can let you decide if it’s worth paying for or not.
Prince lets you use HTML and CSS to generate PDFs. Because it’s only HTML and CSS, it’s very easy to create a very nice looking PDF. It also supports JavaScript so you can also use a syntax highlighting library. (We used highlight.js.) This will make your code samples look way better.
Converting markdown to HTML
So this should clarify the first task that we needed a library for. Our command-line tool needs it because it’ll convert our markdown to HTML. It’ll then pass that HTML to Prince which will then convert it into our PDF book.
Converting markdown to HTML is pretty straightforward. Most programming languages have a parsing library that’ll do most of the work for you. Adam used parsedown (It’s a PHP library) and so did I.
That said, Adam and I both had to modify the parsedown library slightly. That’s because we needed to tweak it to do things that most markdown parsing libraries don’t do by default.
Adding IDs to headings
The main thing that we both needed to do was add HTML IDs to the HTML headings. Why do we need to do this? It’s because we will need the IDs when we generate the table of content. This allows Prince to create handy clickable links inside your PDF.
It’s worth noting that, if you use a library to edit PDFs (as I did), these links might not survive the process. So you might not need to do this at all. We’ll talk about this a bit later when we go over the table of content.
But, for now, we’re go ahead with the modification of the Parsedown class. We’ll start by extending the original class as show below. This lets us add our own functionality to the class without too much of a hassle.
use Parsedown as BaseParsedown;

class Parsedown extends BaseParsedown
{
    // ...
}
Modifying the constructor
Before we get to the ID generation, we need to do some preliminary work on the Parsedown class. First, we’re going to add a constructor. We’ll use it to initialize an internal variable called generatedIds.
use Parsedown as BaseParsedown;

class Parsedown extends BaseParsedown
{
    /**
     * All the generated HTML IDs for the current markdown document.
     *
     * Array uses the base ID as a key and the number of occurrences of that ID as the value.
     *
     * @var array
     */
    private $generatedIds;

    /**
     * Constructor.
     */
    public function __construct()
    {
        $this->generatedIds = [];
    }

    // ...
}
The generatedIds variable will store all the IDs that we’re generating for our headings. We need to do this because we can’t have two identical HTML IDs. So the generatedIds variable will track all the IDs that we create so that we don’t create a duplicate one.
use Parsedown as BaseParsedown;

class Parsedown extends BaseParsedown
{
    // ...

    protected function blockHeader($Line)
    {
        $block = parent::blockHeader($Line);

        if (!is_array($block) || empty($block['element']['text'])) {
            return $block;
        }

        $block['element']['attributes'] = [
            'id' =>  $this->createId($block['element']['text']),
        ];

        return $block;
    }

    // ...
}
Next, we want to override the blockHeader method. This is the method that parsedown uses to generate the heading HTML attributes. Since the HTML ID that we want to add is also an attribute, this is where we need to add our code.
We start by calling the parent blockHeader method to get the parsed heading. We then pass the parsed heading through a guard clause. This guard clause checks if the heading has any text since that’s what we need to generate the ID.
Generating the ID
Once through the guard clause, we can go ahead and generate the ID using the heading text. All the logic for that is in the createId method. You can see it below.
use Parsedown as BaseParsedown;

class Parsedown extends BaseParsedown
{
    // ...

    /**
     * Create an HTML ID for the given text.
     *
     * @param string $text
     *
     * @return string
     */
    private function createId($text)
    {
        $attributeId = $id = preg_replace('/[^a-z0-9_-]/', '', strtolower(strtr(trim($text), ' ', '-')));

        if (!isset($this->generatedIds[$id])) {
            $this->generatedIds[$id] = 0;
        }

        if ($this->generatedIds[$id] > 0) {
            $attributeId .= '-'.$this->generatedIds[$id];
        }

        $this->generatedIds[$id]++;

        return $attributeId;
    }

    // ...
}
We start by running the through a bunch of PHP string functions. First, we use the trim function to remove white spaces on each side. We then pass the trimmed text to the strtr function to replace the white spaces inside the heading with dashes. After that’s done, we convert the text to lowercase with the strtolower function.
We finish it up by using the preg_replace function. This is a PHP function that lets us replace text using a regular expression. Here, we use it to remove any character that isn’t a lowercase letter, a number, an underscore or a dash.
We then assign that ID to two variables: id and attributeId. id is the ID that we generated for the given text. attributeId will be the unique HTML ID that the createId method will return once we’re done.
Making the ID unique
So once we have our generated id, we need to ensure that it’s unique. We do that keeping all the IDs that we generated in an associative array inside the extended Parsedown class. It’s the generatedIds array we initialized in the constructor.
First, we check if the id is already a key in our generatedIds array. If it isn’t, we initialize the ID counter for it at 0. We follow up by checking whether that counter is greater than 0.
If it is, it means that this isn’t the first time that we generated that ID. This means that we can’t leave attributeId the same as the id variable. We need to append the counter number (with a dash) to it so that the HTML ID remains unique.
We finish by incrementing the counter in the generatedIds array. Once that’s done, we return the attributeId variable back.
Adding captions to images
Another thing I wanted was image captions. However, this isn’t something that markdown supports. So I had to get a bit creative with how to support them.
Since markdown supports image titles, I decided to use them as image captions. This required a small change to the Parsedown class. You can see it below.
use Parsedown as BaseParsedown;

class Parsedown extends BaseParsedown
{
    // ...

    protected function inlineImage($Excerpt)
    {
        $image = parent::inlineImage($Excerpt);

        if (!is_array($image)
            || !isset($image['element']['name'], $image['element']['attributes']['src'], $image['element']['attributes']['title'])
            || 'img' !== $image['element']['name']
        ) {
            return $image;
        }

        $image['markup'] = "<figure><img src=\"{$image['element']['attributes']['src']}\" /><figcaption>{$image['element']['attributes']['title']}</figcaption></figure>";

        return $image;
    }

    // ...
}
I overwrote the inlineImage method much like I did with the blockHeader method. The method also begins with a guard clause. Here, we’re checking to ensure that all the required HTML attributes are present and that we actually have an image.
Once through the guard clause, we can build the HTML markup for our captioned image. We wrap the img tag in a figure tag. We then put the image title in a figcaption tag inside the figure tag.
Generating the HTML
With the Parsedown class modified, we’re ready to convert our markdown to HTML. I’m going to explain how I handled it for my book, but you might want to do this differently. It really comes to how you want to structure and process the HTML.
In my case, I decided to break down the HTML per section. So instead of generating all the HTML for all the markdown at once, I did it per section. You can see it below.
use Symfony\Component\Console\Command\Command;
use Symfony\Component\Console\Input\InputInterface;
use Symfony\Component\Console\Output\OutputInterface;

class BuildPdfCommand extends Command
{
    // ...

    protected function execute(InputInterface $input, OutputInterface $output)
    {
        // ...

        $preface = $this->generateMarkdownHtml('content', '0-*.md');
        $section1 = $this->generateMarkdownHtml('content', '1-*.md');
        $section2 = $this->generateMarkdownHtml('content', '2-*.md');
        $section3 = $this->generateMarkdownHtml('content', '3-*.md');
        $section4 = $this->generateMarkdownHtml('content', '4-*.md');

        // ...
    }

    // ...
}
So here’s a first look at the BuildPdfCommand class. This is the class representing one command in my command-line tool. I built it and the rest of the tool using the Symfony console component.
Whenever you run a command, the Symfony console application will call the execute method. This is where most of the code to create the book lives. This is what we’ll cover it for the rest of the article.
For now, you can see five calls to the generateMarkdownHtml method. Each call generates the HTML for one of the four book sections and the preface. We then stored the generated HTML in a variable.
The generate method
You can see the generateMarkdownHtml method below. The method relies on the Symfony finder component to scan the project directory for markdown files. The component uses a fluent interface to control the file search.
use App\Markdown\Parsedown;
use Symfony\Component\Console\Command\Command;
use Symfony\Component\Console\Input\InputInterface;
use Symfony\Component\Console\Output\OutputInterface;

class BuildPdfCommand extends Command
{
    /**
     * Markdown parser
     *
     * @var Parsedown
     */
    private $parser;

    // ...

    private function generateMarkdownHtml($path, $extension)
    {
        $html = '';
        $files = Finder::create()->files()->in($path)->name($extension)->depth(0)->sortByName();

        foreach ($files as $file) {
            $html .= $this->parser->text($file->getContents());
        }

        return $html;
    }

    // ...
}
Here, we’re looking for files with a specific path and extension. We only scan for files in the immediate directory. We then tell Finder to sort everything by name.
We pass each file that Finder found through the text method of our Parsedown class. This will convert the markdown to HTML. We then append it to the html variable which we return at the end.
Creating the table of contents
Next, we have to create HTML for the table of contents. With Prince, you use a nested list of links to represent the table of content. How deep you make that nested list will depend on how specific you want your table of content to be.
use Symfony\Component\Console\Command\Command;
use Symfony\Component\Console\Input\InputInterface;
use Symfony\Component\Console\Output\OutputInterface;

class BuildPdfCommand extends Command
{
    // ...

    protected function execute(InputInterface $input, OutputInterface $output)
    {
        // ...

        $contents = $this->generateTableOfContentsHtml($preface).'<div class="separator">∫</div>'
                  . $this->generateTableOfContentsHtml($section1).'<div class="separator">∫</div>'
                  . $this->generateTableOfContentsHtml($section2).'<div class="separator">∫</div>'
                  . $this->generateTableOfContentsHtml($section3).'<div class="separator">∫</div>'
                  . $this->generateTableOfContentsHtml($section4);

        // ...
    }

    // ...
}
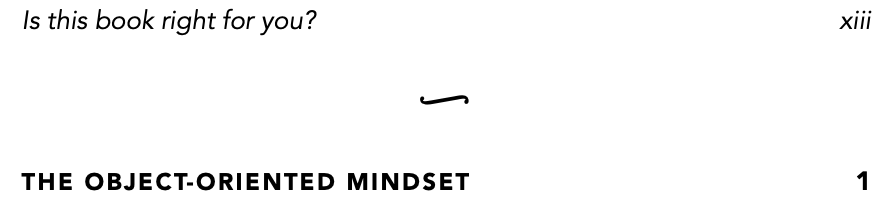
Above is the code that generates that table of contents HTML. We’re passing each of our variables containing the markdown HTML to the generateTableOfContentsHtml method. I concatenate <div class="separator">∫</div> which is the markup I used to create a nice separator between each section. (You can see the result below.)
Crawling the book HTML
Let’s look at the generateTableOfContentsHtml method now. The method does a few different things before generating the HTML. To begin, it needs to crawl through all the HTML that we generated.
use Symfony\Component\Console\Command\Command;
use Symfony\Component\DomCrawler\Crawler;
use Tightenco\Collect\Support\Collection;

class BuildPdfCommand extends Command
{
    // ...

    private function generateTableOfContentsHtml($html)
    {
        $crawler = (new Crawler($html))->filter('h1, h2');
        $headings = new Collection();

        foreach ($crawler as $element) {
            $headings->push([
                'level' => (int) ltrim($element->nodeName, 'h'),
                'title' => $element->textContent,
                'id' => $element->getAttribute('id'),
            ]);
        }

        // ...
    }

    // ...
}
You can see the code used to crawl through the book HTML above. It uses the Symfony DomCrawler component to do it. This is the second important library that I mentioned at the beginning of the article.
We start off by initializing the Crawler class and passing it our html. We then call the filter method with h1, h2. This will tell the crawler that we only want to look for h1 and h2 tags. These are the headings I wanted to use for the table of content. (You can change this to whatever you want for your book.)
Next, we create a Collection object to store our headings. Collections are an amazing component of the Laravel framework. (In fact, Adam’s book was about them!) They’re like super powered PHP arrays that let you do functional programming more easily.
Unlike Symfony components, Laravel doesn’t break out its components into individual packages. Luckily for us, there’s a split package that we can use without pulling in all the Laravel framework. That’s what I used here.
Using the Collection object, we loop through all the elements that the Crawler found. We then use the push method to add each heading to the collection. Each heading we add will have the level of the heading (either 1 or 2 based on the h1 and h2 HTML tags), its title and its id.
Grouping the subsections together
Once through the foreach loop, our Collection object will contain all the sections of the book. The issue is that we just added these sections to a flat array. To create our nested lists, we need to rework the collection and group all subsections under their parent section.
use Symfony\Component\Console\Command\Command;
use Symfony\Component\DomCrawler\Crawler;
use Tightenco\Collect\Support\Collection;

class BuildPdfCommand extends Command
{
    // ...

    private function generateTableOfContentsHtml($html)
    {
        $crawler = (new Crawler($html))->filter('h1, h2');
        $headings = new Collection();

        foreach ($crawler as $element) {
            $headings->push([
                'level' => (int) ltrim($element->nodeName, 'h'),
                'title' => $element->textContent,
                'id' => $element->getAttribute('id'),
            ]);
        }

        $headings = $this->groupHeadingsByLevel($headings);

        // ...
    }

    // ...
}
So after the foreach loop, we pass the headings through the groupHeadingsByLevel method. The method will go through the collection of sections and create a new one. This new Collection object will have all section headings grouped under their parent.
use Symfony\Component\Console\Command\Command;
use Tightenco\Collect\Support\Collection;

class BuildPdfCommand extends Command
{
    // ...

    private function groupHeadingsByLevel(Collection $headings, $level = 1)
    {
        return $headings->chunkWhen(function(array $heading) use ($level) {
            return $level === $heading['level'];
        })->map(function(Collection $headings) use ($level) {
            $heading = $headings->shift();
            $heading['children'] = $this->groupHeadingsByLevel($headings, $level + 1);

            return $heading;
        });
    }

    // ...
}
Above is the groupHeadingsByLevel method. It’s small, but there’s a lot going on! It’s also why we’re using a Collection object. We’re going to use functional programming to group all the headings together.
Splitting our collection
First, we’re going to chunk the collection. Chunking is the process of creating smaller Collection objects from a larger one. By default, Laravel collections only lets you create fixed size chunks. But that’s not what we want to do here.
Here, we want to chunk when the heading level changes in our collection. So to achieve that behaviour, we had to create a new chunking method called chunkWhen. So to achieve this, we have to extend the Collection class. You can do that one of two ways.
Creating a macro
One way is to extend the Collection class using macros. Macros are a way that Laravel lets you extend a class without having to use inheritance. All you have to do is call the macro method and pass it a method name and anonymous function. The Collection object will call the anonymous function whenever you make a call to that method name.
Collection::macro('chunkWhen', function ($callable) {
    $collection = new self();

    $this->each(function($item) use ($callable, $collection) {
        if ($callable($item)) {
            $collection->push(new self());
        }

        $collection->last()->push($item);
    });

    return $chunked;
});
Above is the chunkWhen macro that we’re using. We start with an empty collection. This is going to be the collection that’ll contain all our smaller chunked collections. We then start iterating over all the items in our original collection using the each method.
We pass another anonymous function to the each method. The anonymous function does two things. First, there’s a guard clause that uses the callable anonymous function that we pass to the chunkWhen method. If it returns true, it means that it’s time to create a new chunk collection and add it to the larger collection.
Extending the class
If you’d rather not use a macro, you can just extend the Collection class and add the chunkWhen method. This can be preferable if you want your IDE to be able to know about the method. That said, the code inside the chunkWhen method stays the same as the one in the macro.
use Tightenco\Collect\Support\Collection as BaseCollection;

class Collection extends BaseCollection
{
    public function chunkWhen(callable $callable)
    {
        $collection = new self();

        $this->each(function($item) use ($callable, $collection) {
            if ($callable($item)) {
                $collection->push(new self());
            }

            $collection->last()->push($item);
        });

        return $collection;
    }
}
Rearranging our chunked collections
Once the chunkWhen method returns, our initial collection of headings will now be a collection containing our smaller chunked collections. These collections will have a specific structure. The first item in the collection will be the parent heading while the other items will be the children of that parent.
The second part of the groupHeadingsByLevel method is going to rearrange the structure of our collections. The goal is to make it easier for us to traverse them and create our nested list. To do that, we’re going to use the map method.
use Symfony\Component\Console\Command\Command;
use Tightenco\Collect\Support\Collection;

class BuildPdfCommand extends Command
{
    // ...

    private function groupHeadingsByLevel(Collection $headings, $level = 1)
    {
        return $headings->chunkWhen(function(array $heading) use ($level) {
            return $level === $heading['level'];
        })->map(function(Collection $headings) use ($level) {
            $heading = $headings->shift();
            $heading['children'] = $this->groupHeadingsByLevel($headings, $level + 1);

            return $heading;
        });
    }

    // ...
}
Above you can see the code for it again. We’re going pass an anonymous function to the map method. In it, we’re going to do two things.
First, we’re going to shift the first element off the chunked collection. This is our parent heading. Then we’re going to add the child headings to the parent heading as children.
You’ll notice that the child headings come from the groupHeadingsByLevel method which we call again. Using recursion here lets us rearrange all the section headings regardless of the number of levels we want to use. So while I chose to only use two levels, the code will work if you want to use three or four.
Generating the table of contents HTML
Now that we have our beautiful Collection object with all our headings organized properly, it’s time to generate some HTML! We’re going to use more functional programming to create our nested list. That functional code resides in the generateHeadingsHtml method which appears at the end of the generateTableOfContentsHtml method.
use Symfony\Component\Console\Command\Command;
use Tightenco\Collect\Support\Collection;

class BuildPdfCommand extends Command
{
    // ...

    private function generateHeadingsHtml(Collection $headings)
    {
        return '<ul>'.$headings->map(function(array $heading) {
            $html = '<li>'.sprintf('<a href="#%s">%s</a>', $heading['id'], $heading['title']);

            if (!$heading['children']->isEmpty()) {
                $html .= $this->generateHeadingsHtml($heading['children']);
            }

            return $html.'</li>';
        })->implode('').'</ul>';
    }

    // ...
}
The map method takes an anonymous function as its argument. The anonymous function then receives each heading array that we created earlier. We start by creating the first part of the li HTML block using the sprintf function.
Afterwards, we check if our section has subsections by doing an isEmpty on the children collection inside the headings collection. If it’s not empty, we make a recursive call to the generateHeadingsHtml method. We pass it the children collection.
The generateHeadingsHtml wraps up by closing the li tag. We then use the implode method to glue all the headings together. We finish off by concatenating the closing ul tag at the end of the larger HTML block. And that wraps up the generation of the table of contents!
Assembling the book
Now that you have all your HTML generated, what do you do with it? Well, that’ll depend on how you want to structure your book. For my book, I took all that HTML and inserted it into a Twig template. I then used the file_put_contents function to save it to the book.html file.
use Symfony\Component\Console\Command\Command;
use Symfony\Component\Console\Input\InputInterface;
use Symfony\Component\Console\Output\OutputInterface;
use Twig\Environment;

class BuildPdfCommand extends Command
{
    // ...

    /**
     * @var Environment
     */
    private $twig;

    protected function execute(InputInterface $input, OutputInterface $output)
    {
        // ...

        file_put_contents('book.html', $this->twig->render('template.html.twig', [
            'contents' => $contents,
            'preface' => $preface,
            'section1' => $section1,
            'section2' => $section2,
            'section3' => $section3,
            'section4' => $section4,
        ]));

        // ...
    }

    // ...
}
You can see that code above. All the generated HTML was stored in specific variables. You have the four book sections, the preface and the table of contents which we just covered.
Once the output.html file created, the tool would then call Prince. Prince would convert the HTML file that it created using the Twig template into a PDF. The tool does this using a child process.
use Symfony\Component\Console\Command\Command;
use Symfony\Component\Console\Input\InputInterface;
use Symfony\Component\Console\Output\OutputInterface;
use Twig\Environment;

class BuildPdfCommand extends Command
{
    // ...

    /**
     * @var Environment
     */
    private $twig;

    protected function execute(InputInterface $input, OutputInterface $output)
    {
        // ...

        file_put_contents('output.html', $this->twig->render('template.html.twig', [
            'contents' => $contents,
            'preface' => $preface,
            'section1' => $section1,
            'section2' => $section2,
            'section3' => $section3,
            'section4' => $section4,
        ]));

        $process = new Process("prince output.html --javascript -o $princeFile");
        $process->run();

        // ...
    }

    // ...
}
This secondary process is necessary because Prince is also a command-line tool. You can see the command that the tool runs as a child process above. We just pass the output.html file that we created with Twig and tell it to generate the output.pdf file.
The --javascript option tells Prince to run the JavaScript code found in the HTML document. This is necessary because of the syntax highlighting library that I used for the book. You don’t need this option if you’re not using any JavaScript.
Creating the different PDFs
Once Prince finished creating the main PDF, the tool would use it to create the book samples. These are the samples you’d get when you gave me your email address on the marketing site. I also used them when I was promoting the launch of the book.
use Symfony\Component\Console\Command\Command;
use Symfony\Component\Console\Input\InputInterface;
use Symfony\Component\Console\Output\OutputInterface;

class BuildPdfCommand extends Command
{
    // ...

    protected function execute(InputInterface $input, OutputInterface $output)
    {
        $princeFile = 'output.pdf';
        $samples = [
            'discover-object-oriented-programming-using-wordpress.pdf' => range(1, 165),
            'sample-foreword.pdf' => [1, 2, 3, 4, 5, 6, 7, 8, 9, 10, 11],
            'sample-mindset.pdf' => [1, 2, 3, 4, 5, 6, 7, 8, 33, 34, 35, 36, 37, 38, 39],
            'sample-encapsulation.pdf' => [1, 2, 3, 4, 5, 6, 7, 8, 42, 43, 44, 45, 46, 47, 48, 49, 50, 51],
        ];

        // ...

        foreach ($samples as $sampleFile => $samplePages) {
            $this->createPdf($princeFile, $sampleFile, $samplePages);
        }
    }

    // ...
}
Above is the code in the execute method that creates the PDF samples. It starts with a PHP array which we use as an associative array. You might be more familiar with the term dictionary if you use another programming language.
As we loop through this associative array, we pass the key, value and the book file name (princeFile here) to the createPdf method. This method takes those arguments and creates a new PDF file. To create the new PDF file, we’re going to need the library to manipulate PDFs I mentioned as a requirement earlier. (The PHP library that I used was FPDI.)
use Symfony\Component\Console\Command\Command;

class BuildPdfCommand extends Command
{
    // ...

    private function createPdf($sourceFile, $outputFile, array $pages)
    {
        $pdf = new Fpdi();
        $pdf->setSourceFile($sourceFile);

        foreach ($pages as $page) {
            // import a page
            $pageId = $pdf->importPage($page);
            // get the size of the imported page
            $size = $pdf->getTemplateSize($pageId);

            // add a page with the same orientation and size
            $pdf->AddPage($size['orientation'], $size);

            // use the imported page
            $pdf->useTemplate($pageId);
        }

        $pdf->output('F', $outputFile);
    }

    // ...
}
You can see the PHP code for the createPdf method above. We loop through all the pages that we passed to the createPdf method. The loop imports the page from the original PDF that Prince created. It then adds these imported pages to the new PDF file.
Now, there’s something you should know if you create PDFs this way. The process will create a brand new PDF file, but it won’t have all the metadata from the original PDF. This means you’ll lose all the internal links that Prince would have created for you. So that’s something to keep in mind if you use a library like FPDI to generate your PDFs.
Creating a mobile version
When I first published the book, I had no plans to make a mobile version for it. But I had a few requests for it, so I created one. After some research, I found out it was quite easy to do with pandoc.
use Symfony\Component\Console\Command\Command;
use Symfony\Component\Console\Input\InputInterface;
use Symfony\Component\Console\Output\OutputInterface;
use Symfony\Component\Finder\Finder;
use Symfony\Component\Process\Process;

class BuildMobileCommand extends Command
{
    public function __construct()
    {
        parent::__construct('book:build-mobile');
    }

    protected function execute(InputInterface $input, OutputInterface $output)
    {
        $command = 'pandoc -f markdown+smart'
                 . ' -o discover-object-oriented-programming-using-wordpress.epub'
                 . ' --epub-cover-image=assets/images/cover.jpg'
                 . ' --css=assets/css/epub.css'
                 . ' -M author="Carl Alexander"'
                 . ' -M title="Discover object-oriented programming using WordPress"';

        $files = Finder::create()->files()->in('content')->name('*.md')->sortByName();

        foreach ($files as $file) {
            $command .= ' '.$file->getPathName();
        }

        $process = new Process($command);
        $process->run();
    }
}
I added the build-mobile command (which you can see above) to the tool I built. Executing the command just runs the a pandoc command to generate the EPUB file. The command scans for all the markdown files and passes them as arguments to pandoc.
Giving back
And this wraps up how I wrote my book in markdown! I’m so thankful to Adam Wathan for sharing his code with me. I don’t know how I would have been able to create the PDF that I wanted without it.
It’s in that spirit that I wrote this article. I’m sure I’m not the only developer out there who’s struggling with this. I wanted to put something out there to help anyone looking to write a book.
I shared a lot of code based on Adam’s project. His and mine contained a lot of code and CSS specific to our books. That said, I created a striped-down template project of the tool that I built for my book. This should server as great foundation (much like Adam’s code was to me) to anyone looking to build a similar tool.
For anything else, leave your questions below!