
Keeping a WordPress site up to date can be quite a challenge. There are a lot of reasons why we don’t. They range from lack of time to just not wanting to break anything.
It also doesn’t matter whether you’re just managing one site or dozens. Or whether you’re using a dedicated host or your own managed server. Life can get in the way, and your WordPress site can become outdated and even hacked.
The best way to get around a lot of these issues is to automate the entire WordPress update process. In fact, this is something that WordPress already does. By default, WordPress will only perform minor updates without you having to do anything. You still have to do major updates yourself.
But this isn’t something that you can do if your WordPress site uses Bedrock as its project structure. With Bedrock, WordPress automatic updates are disabled. That’s because all dependencies are managed using Composer.
This means that to automate WordPress updates, we have to automate the update of our Composer dependencies. To achieve this, we’ll have to leverage continuous integration as well as automated deployment. To bring everything together, we’ll use CircleCi as our continuous integration platform. (But you should be able to easily use another one if you prefer.)
A few things before we start
Continuous integration workflows can be quite complex. So, before we begin, we need to go over what this article will cover. This will help keep the continuous workflow pretty simple.
The tradeoff is that it might make the article a bit less relevant to you. That said, you’re free to ask questions in the comments. I’ll do my best to try to help you!
We’re doing this for my site
First of all, we’re just going to just look at how I automated the WordPress updates for my WordPress site. The code for it is available on GitHub. So you can refer to it at any time.
Second, we won’t cover any testing. My WordPress site is pretty basic. There’s no need for it to have either a unit testing suite nor an integration testing suite. (You can look at this article if you’re curious on how to run tests on CircleCI.)
Next, there’s dependency management. As I mentioned briefly in the introduction, this is about automating the updates of a Bedrock site. This is the project structure that my WordPress site uses. With Bedrock, WordPress doesn’t handle its own updates as it would normally. It’s all done using Composer, which is PHP’s dependency management tool.
This means that managing WordPress updates is really about managing updates to our Composer dependencies. This is a very different WordPress update workflow to what you might be used to doing. But, for this to work, you need to manage updates in a way that doesn’t involve the WordPress admin even if it’s just using WP-CLI.
This is a self-hosted WordPress site
The next thing to cover is the hosting setup. I don’t host my WordPress site on one of the numerous hosting platforms in the WordPress ecosystem. Instead, it’s hosted on a server that I manage on DigitalOcean.
I configured my server using “DebOps for WordPress“. This is an Ansible project that I maintain. My website has been running on a server managed by it since 2015.
To automate my deployments to the server, I’ve been using deployer. This is a popular PHP tool for automating deployments and the one I recommend with DebOps. If you use a specific host, they might have a way for you to deploy code using the command-line in a similar fashion. (For example, Pantheon has their Terminus command-line tool.)
Otherwise, you can also use git to handle the deployment. This will vary from host to host. Two hosts that support git-based deployment (also known as “git push”) are SiteGround and WPEngine
Your code needs to be in a git repository on GitHub
And speaking of git, the last thing to cover is the version control system. For this setup, we’re going to be using git as our version control system. We won’t cover other ones.
That said, not only are we using git for this, we’re also going to use GitHub. Sadly, some of what we’ll use is GitHub specific. So you won’t be able to implement this workflow if you’re using Bitbucket or GitLab.
Building the workflow
With all this out of the way, we can start looking at how we’ll put this automated workflow together! There are a few elements to it. We’ll go over each of them and configure them.
Dependabot
The first thing that we’re going to look at and configure is “Dependabot“. Dependabot is a service that scans for outdated dependencies in your GitHub project. Whenever it finds one, it creates pull requests to update it.
Dependabot used to be a paid service, but it was acquired by GitHub. The good news is that GitHub made Dependabot free for everyone to use. The bad news is that there’s no plan to support other services such as Bitbucket or GitLab. This is why we’re limited to GitHub repositories for this.
Installation
To install Dependabot, you need to go find it on the GitHub marketplace. There, you’ll see a button that says “Set up a plan” as shown below. Once you click on it, you’ll be taken to the bottom of the page where you can select a plan. But since the service is now free, there’s only the free plan left.
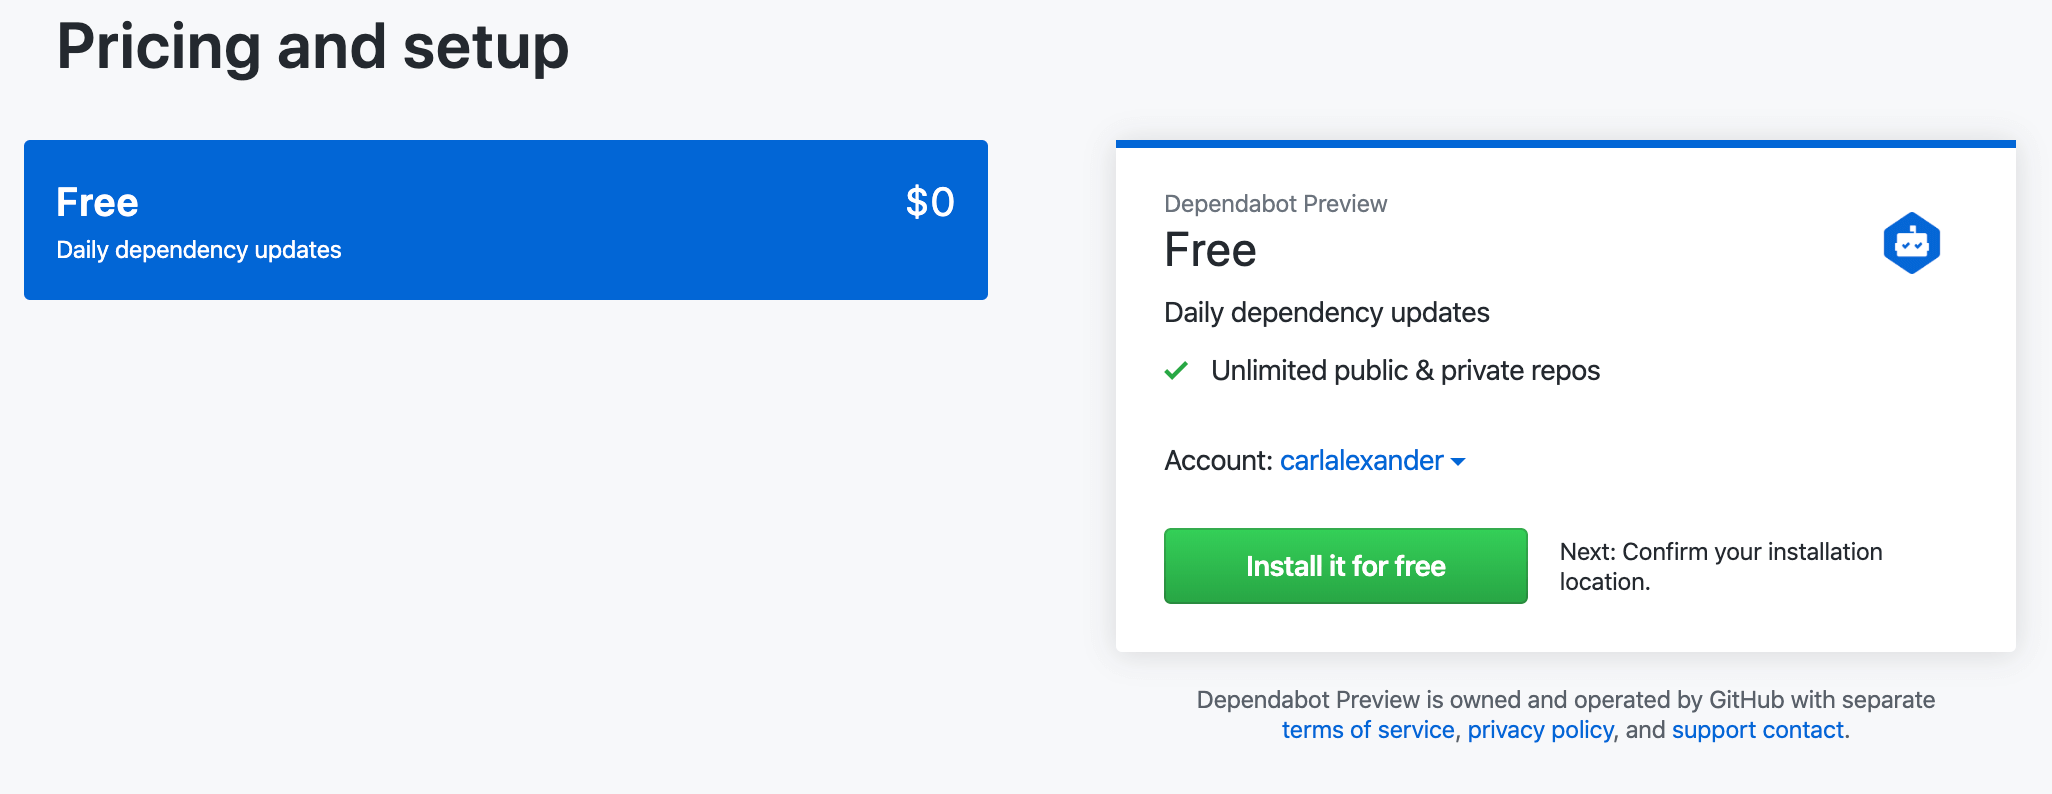
Once you’ve selected a plan, you’ll be asked to complete the order and begin the installation. The installation screen (also shown below) will ask you to give Dependabot access to your repositories. You can choose to either give it access to all your repositories or select specific ones to give it access to. (I chose to only give it access to the one for my WordPress site.)
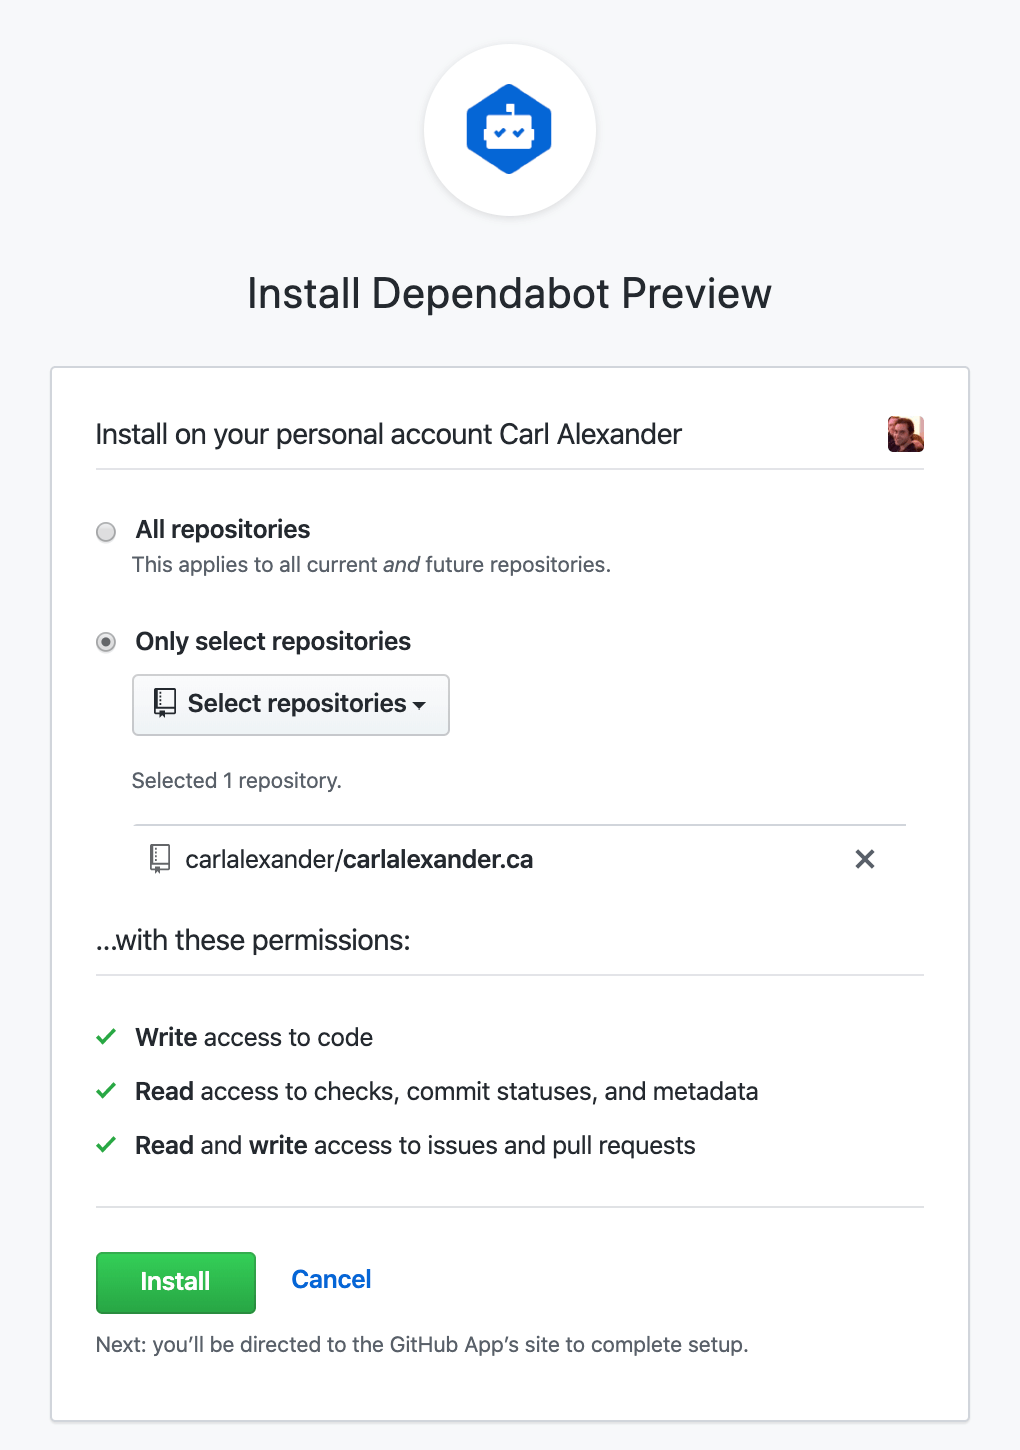
After that, you’ll need to authorize GitHub to share information with Dependabot. Once you click on the authorize button, you’ll be taken to the Dependabot website. There, you’ll see all the repositories that you authorized Dependabot to see.
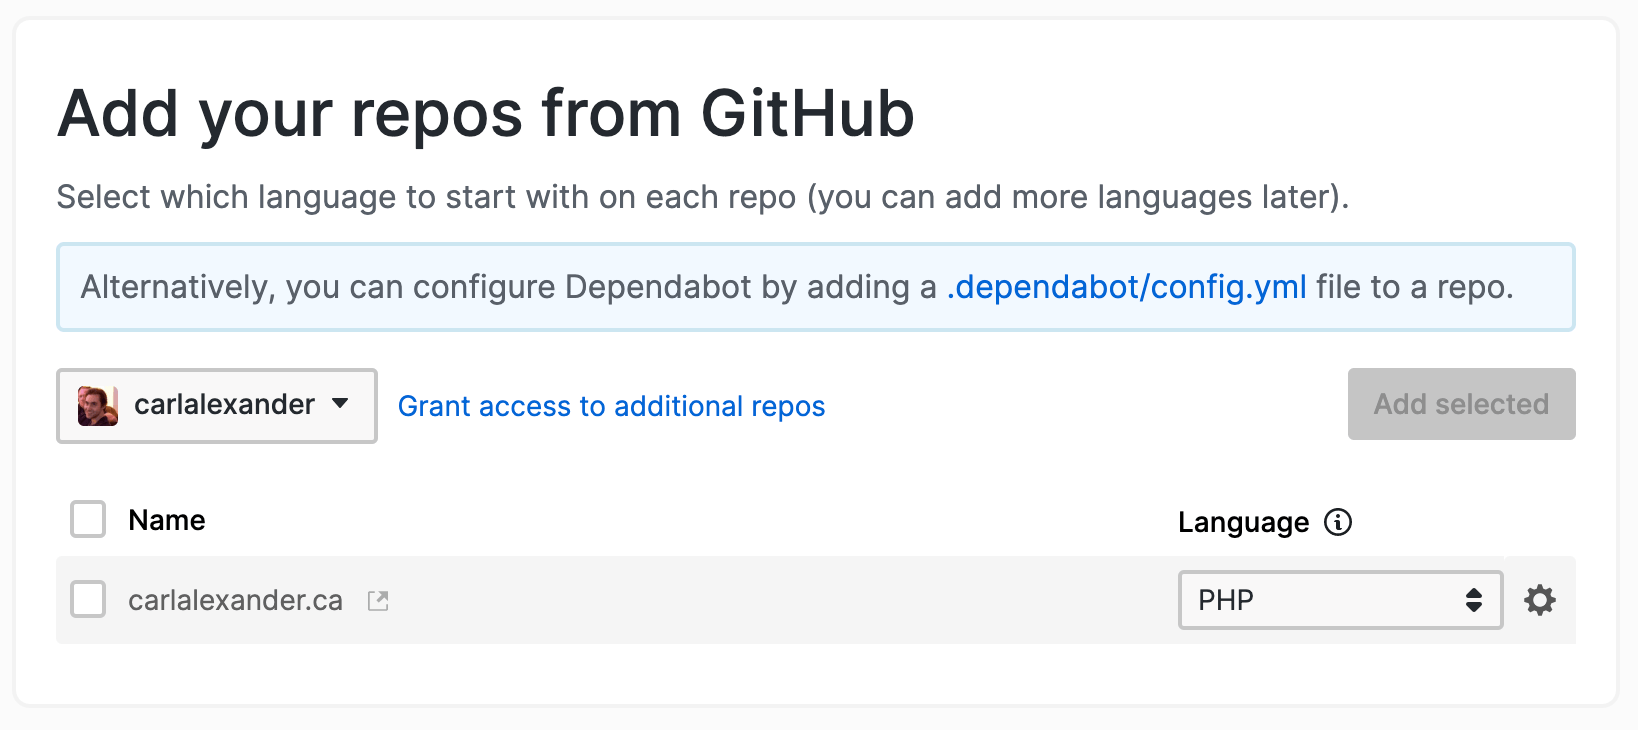
As you can see above, by default, it’ll select PHP as the programming language of the repository. This is only temporary. You can add checks for more programming languages once you added the repository.
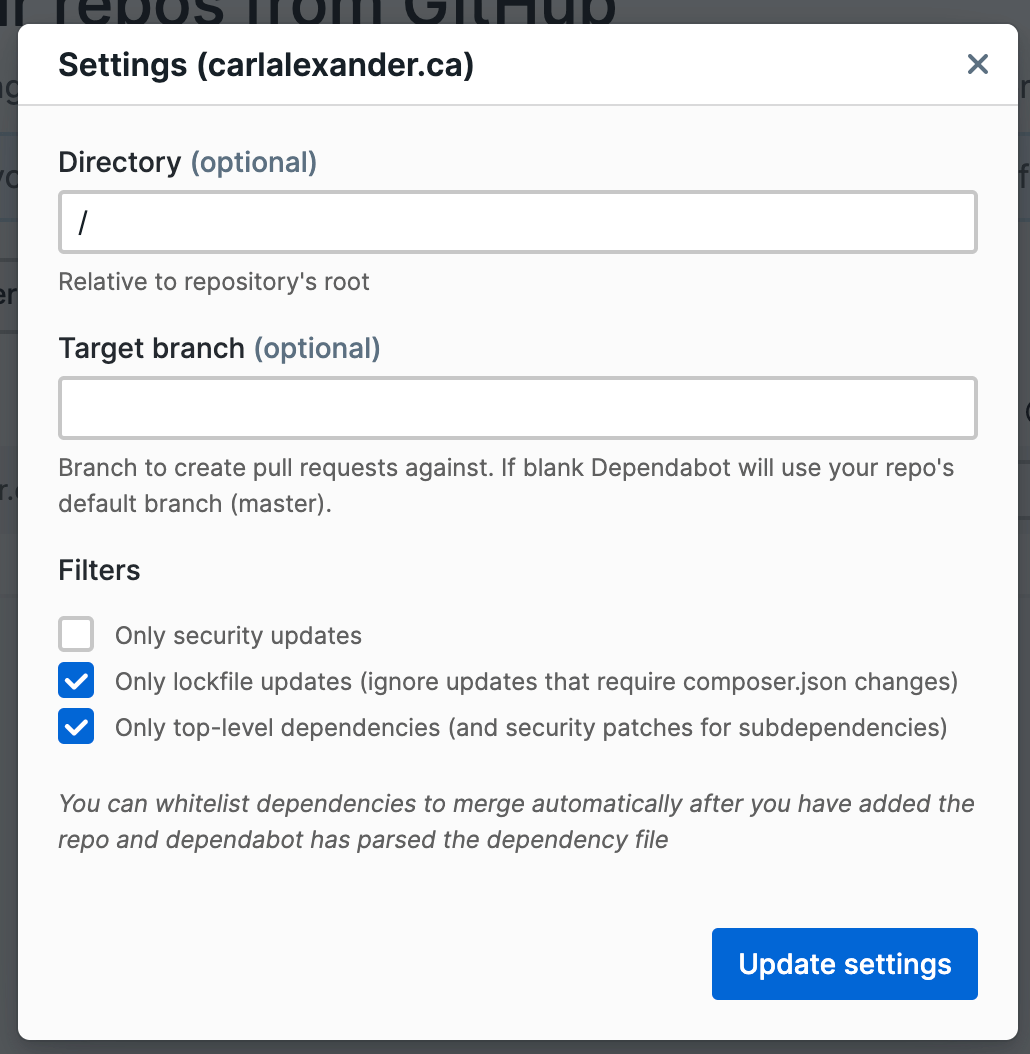
You’ll also want to go check the settings for your repository. You might need to make some changes for your project. For my WordPress site repository, I selected the option to only update the composer.lock file. If you don’t use a lock file, you’ll want to keep that option unchecked.
Once you’re satisfied with everything, check the repository and add it to the list of monitored repositories. This will take you to a new screen where you can see your list of monitored repositories and their languages. You should also see that Dependabot is already running for the new repository.
Enable automatic pull request merges
Once Dependabot finishes running, you should see some open pull requests on GitHub. By default, Dependabot won’t merge these pull requests for you. You have to make some configuration changes for it to do so.

First, you need to go to the account settings page which you can see above. At the bottom, there’s an option called “Allow auto-merging to be enabled on projects” which you want to check. When you check it, Dependabot will display a screen shown below.
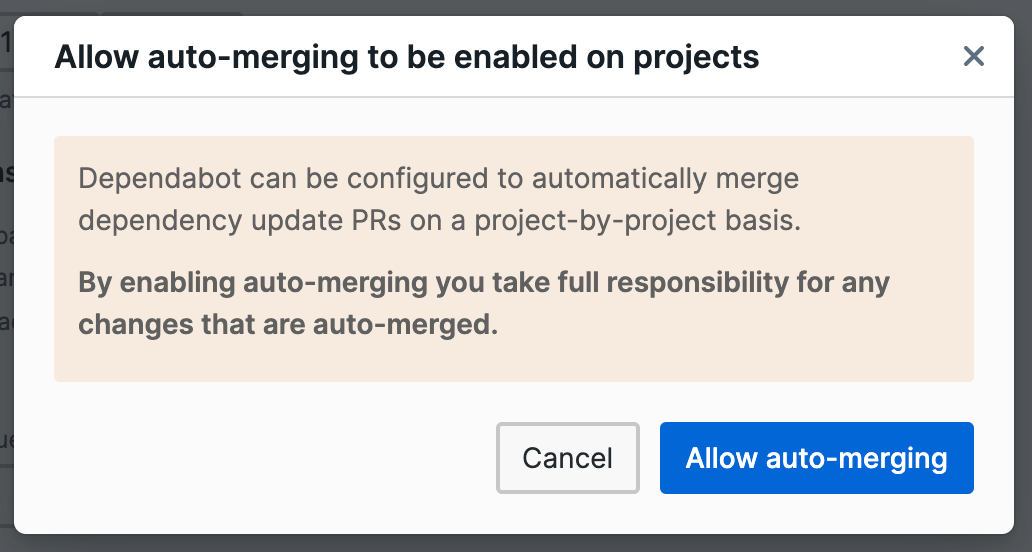
The screen explains that you need to enable automatic pull request merges on a per-repository basis. It also says that you’re responsible for changes that are automatically merged by Dependabot. Again, this is fine since the goal of our workflow is to automate all this.
Once you clicked on “Allow auto-merging”, you want to click “Update settings” to save the changes. You’ll also notice a new option called “Only auto-merge PRs during working hours”. You can check it if you want Dependabot to only merge pull requests during work hours.
Creating the workflow on CircleCI
For now, this is all that we’ll do with Dependabot. We’re going to leave auto-merging disabled and come back to it later. What we want to do next is set up our continuous integration workflow on CircleCI.
With CircleCI, you configure your continuous integration workflow using YAML. You use it to define all your workflow steps as well as your Docker environments. You can check the documentation to see everything that you can do.
All your YAML configuration will go in the .circleci/config.yml file. You need to commit this file needs to your GitHub repository so that CircleCI can read it. Here’s the base .circleci/config.yml file that we’re going to use.
version: 2
jobs:
  deploy:
    docker:
      - image: circleci/php:7.3
    steps:
      - checkout
      - run:
          name: Install deployer
          command: composer global require deployer/deployer:^6.4
      - run:
          name: Add Composer global bin folder
          command: echo 'export export PATH=$HOME/.composer/vendor/bin:$PATH' >> $BASH_ENV
      - run:
          name: Deploy WordPress site
          command: dep deploy
workflows:
  version: 2
  deploy:
    jobs:
workflows:
  version: 2
  deploy:
    jobs:
      - deploy:
          filters:
            branches:
              only:
                - master
The workflow has a single job called deploy. We’ve added a filter so that it only runs on the master branch. You wouldn’t want pull requests or commits to other branches to deploy to your server!
Now, let’s look at the deploy job itself. It uses the circleci/php:7.3 Docker image. This is the prebuilt CircleCI Docker image for PHP 7.3.
Next, we have the steps sections. The deploy job has four steps. The first one checks out the code from the repository. The second one globally installs Deployer using Composer.
Because we installed Deployer globally, we also need to add the Composer global bin folder to PATH environment variable. If we don’t do that, we won’t be able to call it without putting the full path to the Composer global bin folder. (And who wants to do that!) So that’s what our third step does using the command suggested by CircleCI here.
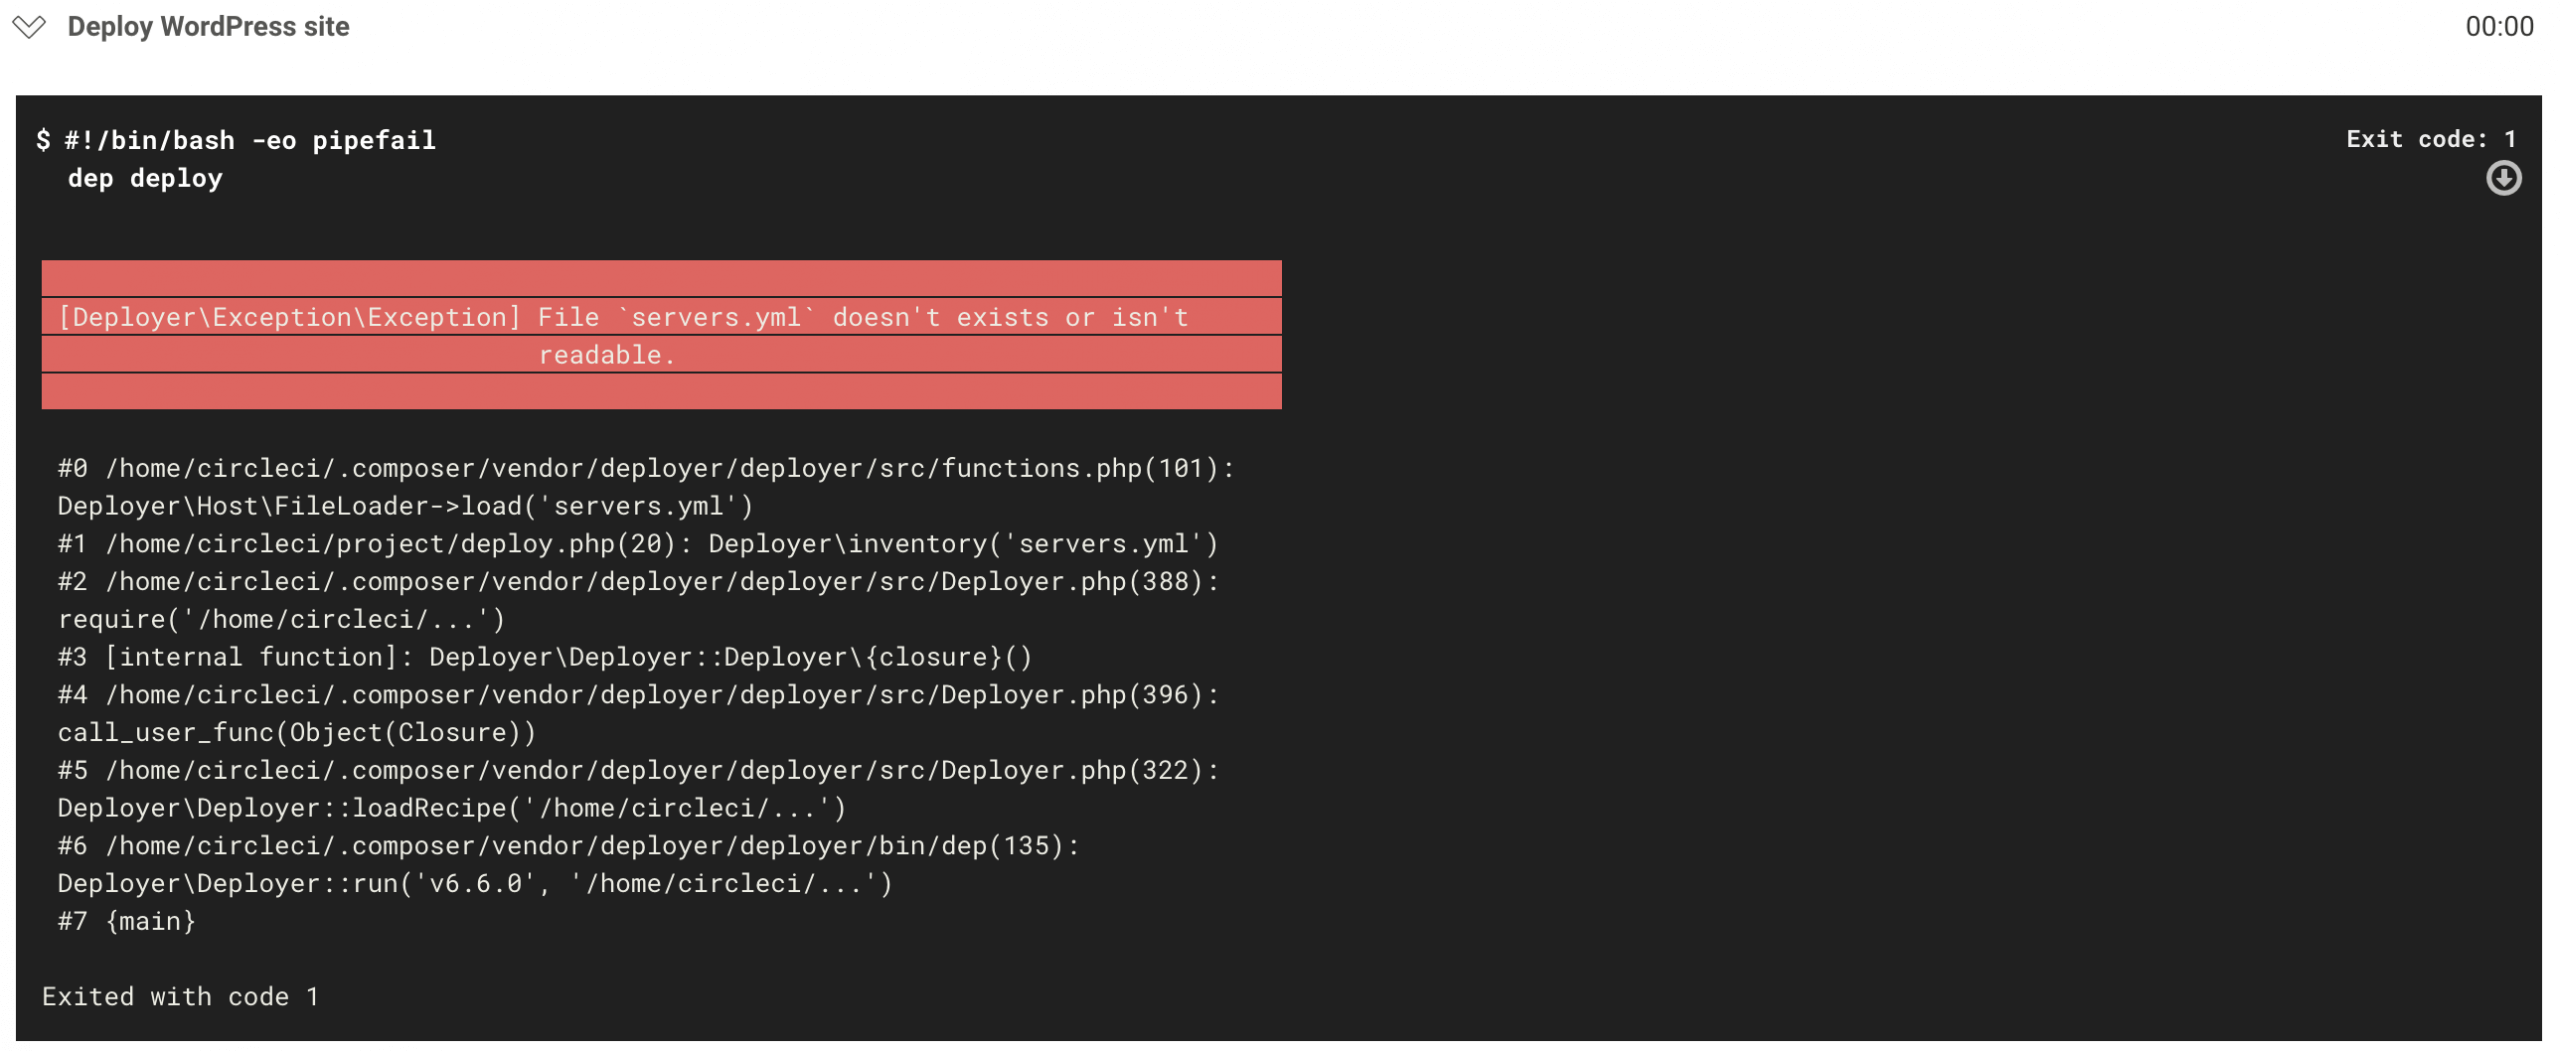
The final step in our deploy job is the one where Deployer deploys our WordPress site. This is where our deploy job breaks down. When CircleCI runs this step, it’ll end in an error (shown above) because Deployer can’t find the servers.yml file.
Why is the servers.yml file missing?
This missing servers.yml file is an inventory file where you put host information that Deployer needs. Normally, the information in that file is pretty sensitive, so you don’t want to commit it for security reasons. But we need a way for this information to be available when we try to deploy from CircleCI.
# servers.yml

www.carlalexander.ca:
  user: some-ssh-user
  stage: production
  deploy_path: '/var/www/carlalexander.ca'
  branch: master
Here’s a slightly modified version of my servers.yml file. The sensitive part is really the user value. Now, by itself, it doesn’t mean much, but it’s always preferable to avoid leaking information. This means that we want the servers.yml to look like this:
# servers.yml

www.carlalexander.ca:
  stage: production
  deploy_path: '/var/www/carlalexander.ca'
  branch: master
We removed the user value. But now we need a way for Deployer to get this value without using the servers.yml. The best way to do that is by using an environment variable.
Adding support for a user environment variable
If you don’t care about leaking your SSH user, you can skip this next part. To add support for environment variables, we’re going to need to create a new Deployer task. This task will load environment variables that we want Deployer to use.
/**
 * Load environment variables
 */
task('load-environment-variables', function () {
    $host = Context::get()->getHost();

    if (empty($host->getUser()) && getenv('DEP_USER')) {
        $host->user((string) getenv('DEP_USER'));
    }
});
You can see the load-environment-variables task above. It gets the host information from the deployment Context class. The host returned by the getHost method is also an object.
Using that Host object, we check if the host already has a user first. This lets us set a user in the inventory file if we chose too. Afterwards, we check if we have the DEP_USER environment variable using the getenv function. If we don’t have user value and a DEP_USER environment variable, we set it as the user value.
/**
 * Deploy task
 */
task('deploy', [
    'load-environment-variables',
    'deploy:prepare',
    'deploy:lock',
    'deploy:release',
    'deploy:update_code',
    'deploy:shared',
    'deploy:vendors',
    'deploy:writable',
    'deploy:symlink',
    'deploy:unlock',
    'cleanup',
    'varnish:reload',
    'php-fpm:reload',
])->desc('Deploy your Bedrock project');
after('deploy', 'success');
Afterwards, you just have to add the load-environment-variables task to the main deploy task. You can see it above. The deploy task is the one from my Bedrock DebOps project template, which you can find here.
Configuring the CircleCI workflow
Now that we’ve made the changes to Deployer, we can go back to CircleCI to configure our workflow. We have two things that we need to do for this. We need to add our DEP_USER environment variable and then add an SSH key to connect to the server.
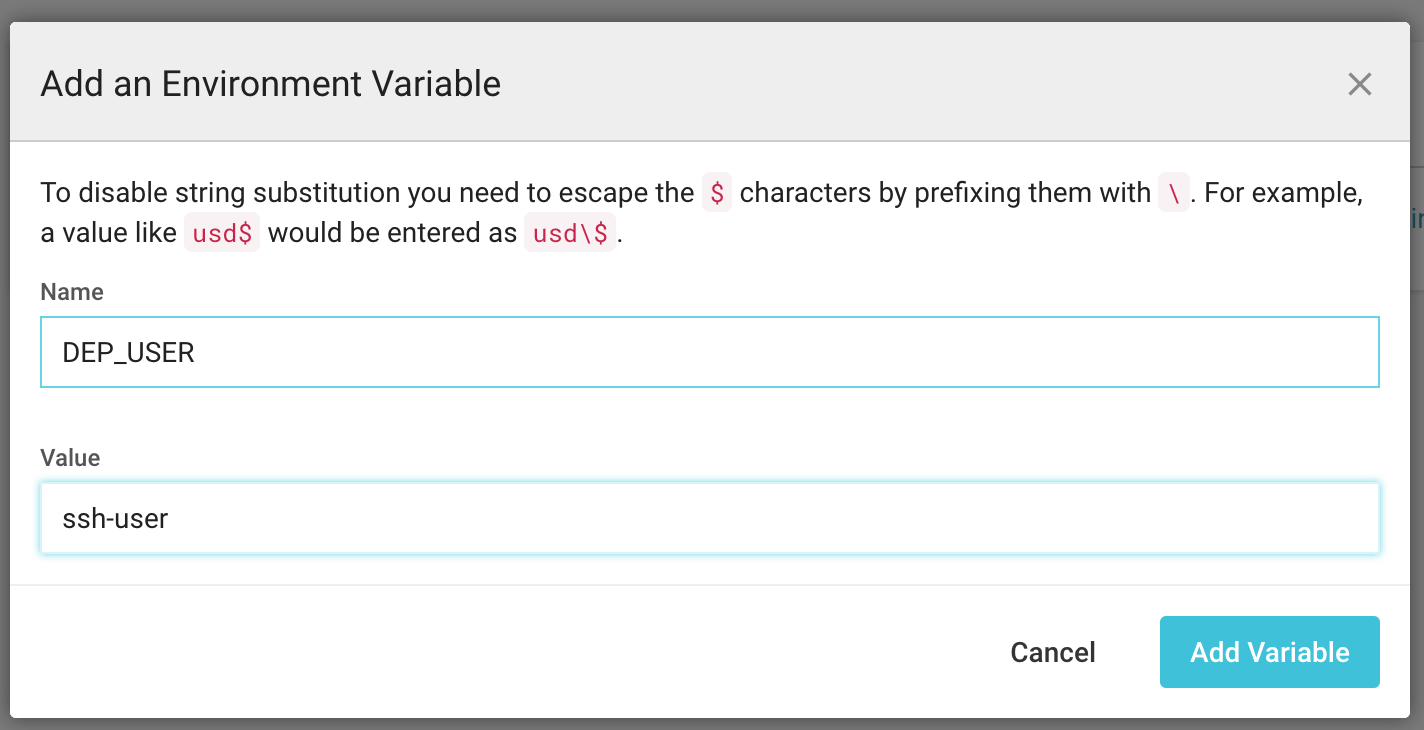
To add an environment variable, you need to your project settings. There, you’ll find a configuration page for environment variables. All that you have to do is add it as shown in the picture above.
Next, we need to add the SSH key that CircleCI will use to connect to the server. We’re going to do that in the project settings as well. But first, we need to generate the SSH key that we’re going to add to CircleCI.
CircleCI has a good guide to help you with that. Here’s the command that I ran to create my SSH key:
ssh-keygen -m PEM -t rsa -C "circleci@carlalexander.ca"
You want to make sure that you don’t overwrite your own SSH key with that. So make sure you don’t create it in the default location. Once you’ve run the command, you should have two files. One is your private key, and the other is your public key. (The public key should end with .pub.)
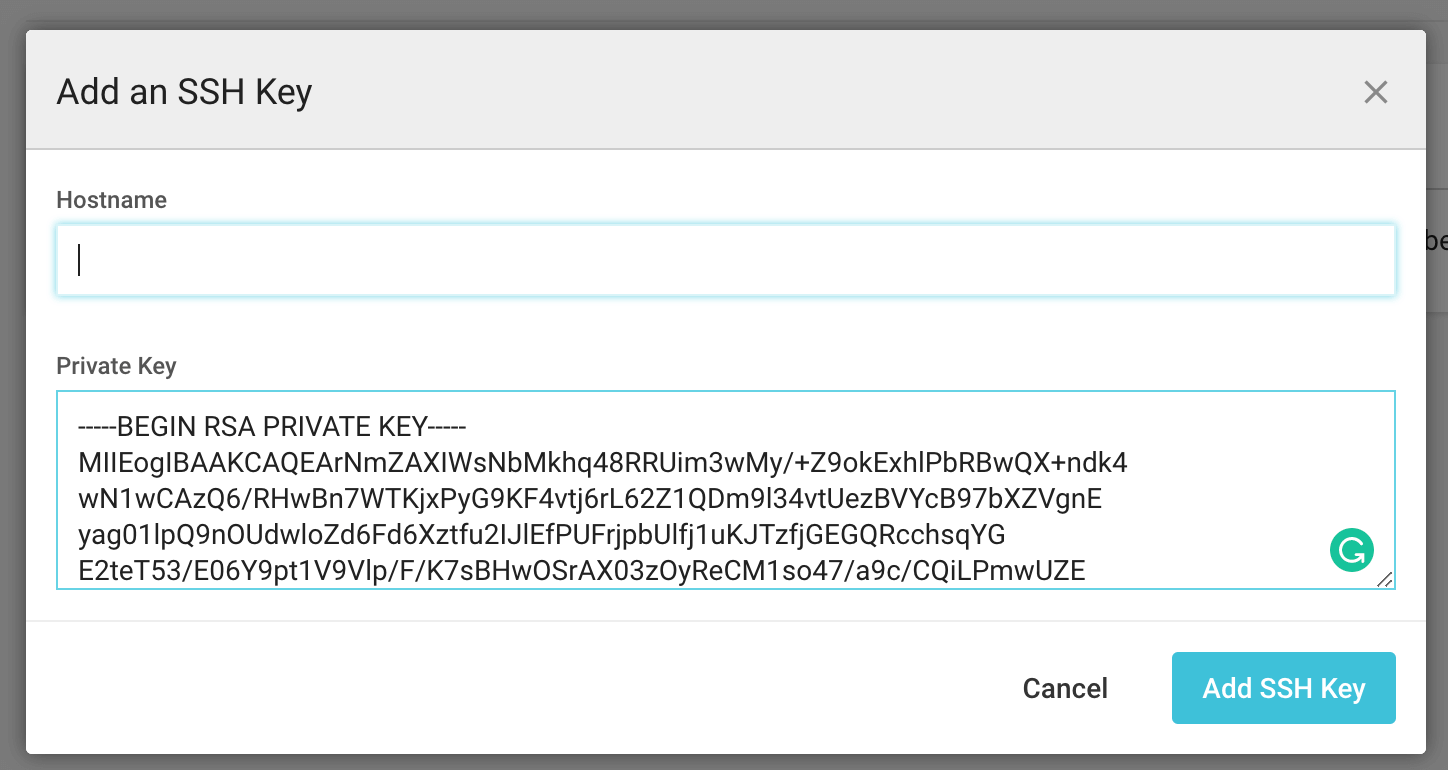
You want to copy the content of the private key to CircleCI. (Shown above.) You can enter a hostname if you want. But it’s only necessary if you’re going to use multiple SSH keys.
Adding the host to known_hosts
If we tried to run your workflow at this point, we’d run into the following error:
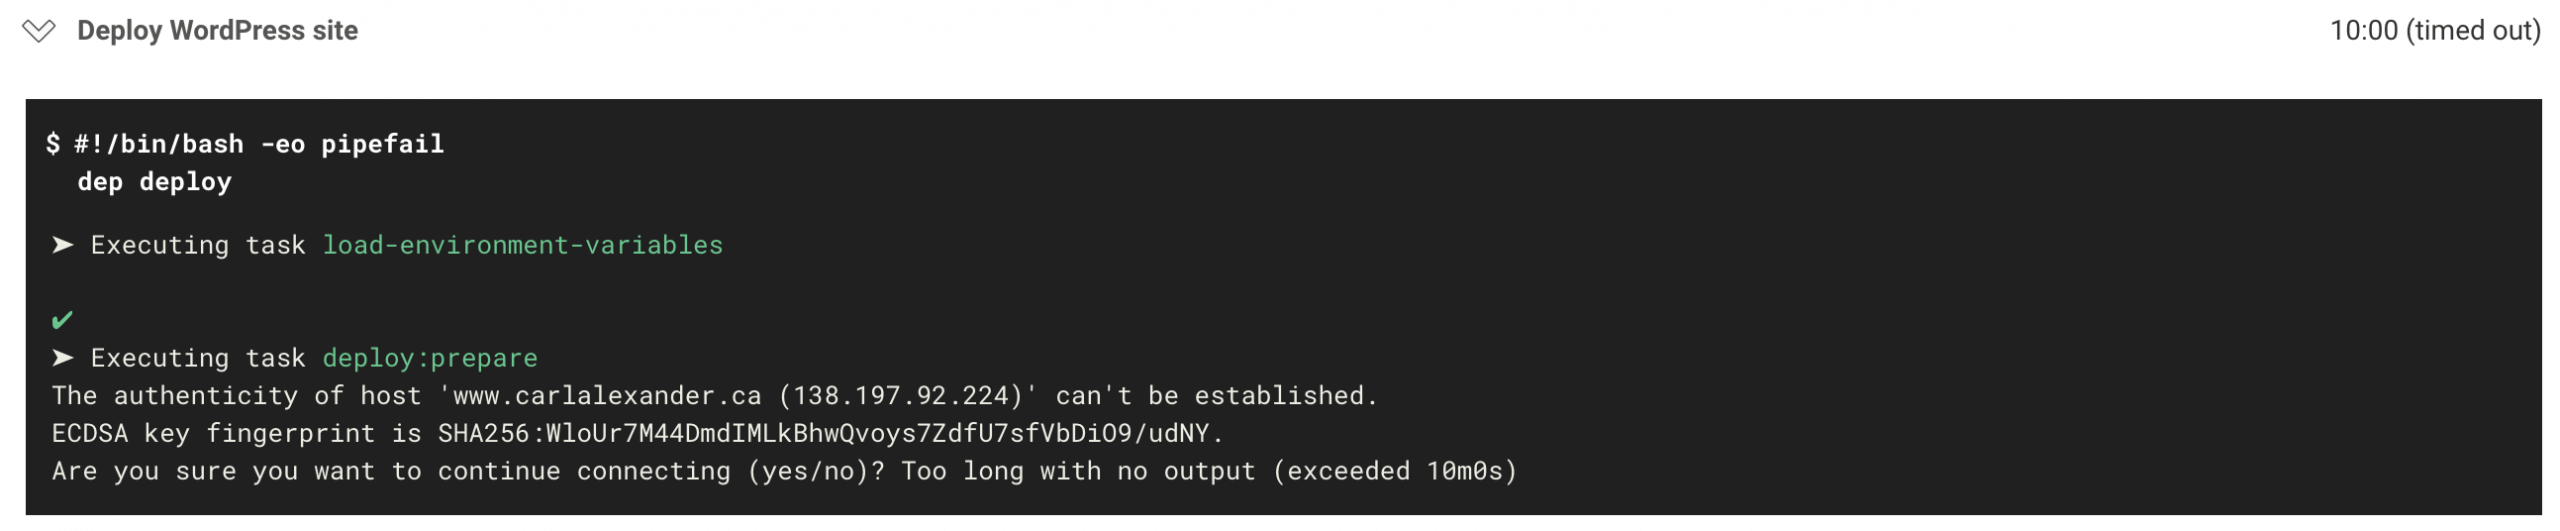
This is a warning that SSH will give you when you try to connect to a host for the first time. Normally, it would ask you to confirm that you want to connect to that host. But since this is all automated, you can’t confirm it as you would normally.
version: 2
jobs:
  deploy:
    docker:
      - image: circleci/php:7.3
    steps:
      - checkout
      - run:
          name: Install deployer
          command: composer global require deployer/deployer:^6.4
      - run:
          name: Add Composer global bin folder
          command: echo 'export export PATH=$HOME/.composer/vendor/bin:$PATH' >> $BASH_ENV
      - run:
          name: Add WordPress server to known hosts
          command: ssh-keyscan -H www.carlalexander.ca >> ~/.ssh/known_hosts
      - run:
          name: Deploy WordPress site
          command: dep deploy
workflows:
  version: 2
  deploy:
    jobs:
      - deploy:
          filters:
            branches:
              only:
                - master
Above is the updated workflow with a new step to eliminate that issue. The step is right before we call Deployer to deploy the site. We use the ssh-keyscan command to add the fingerprint to the known_hosts file.
Adding the public SSH key to the server
Once we fix this issue, running the workflow again will result in a new error. This time, the error will be:
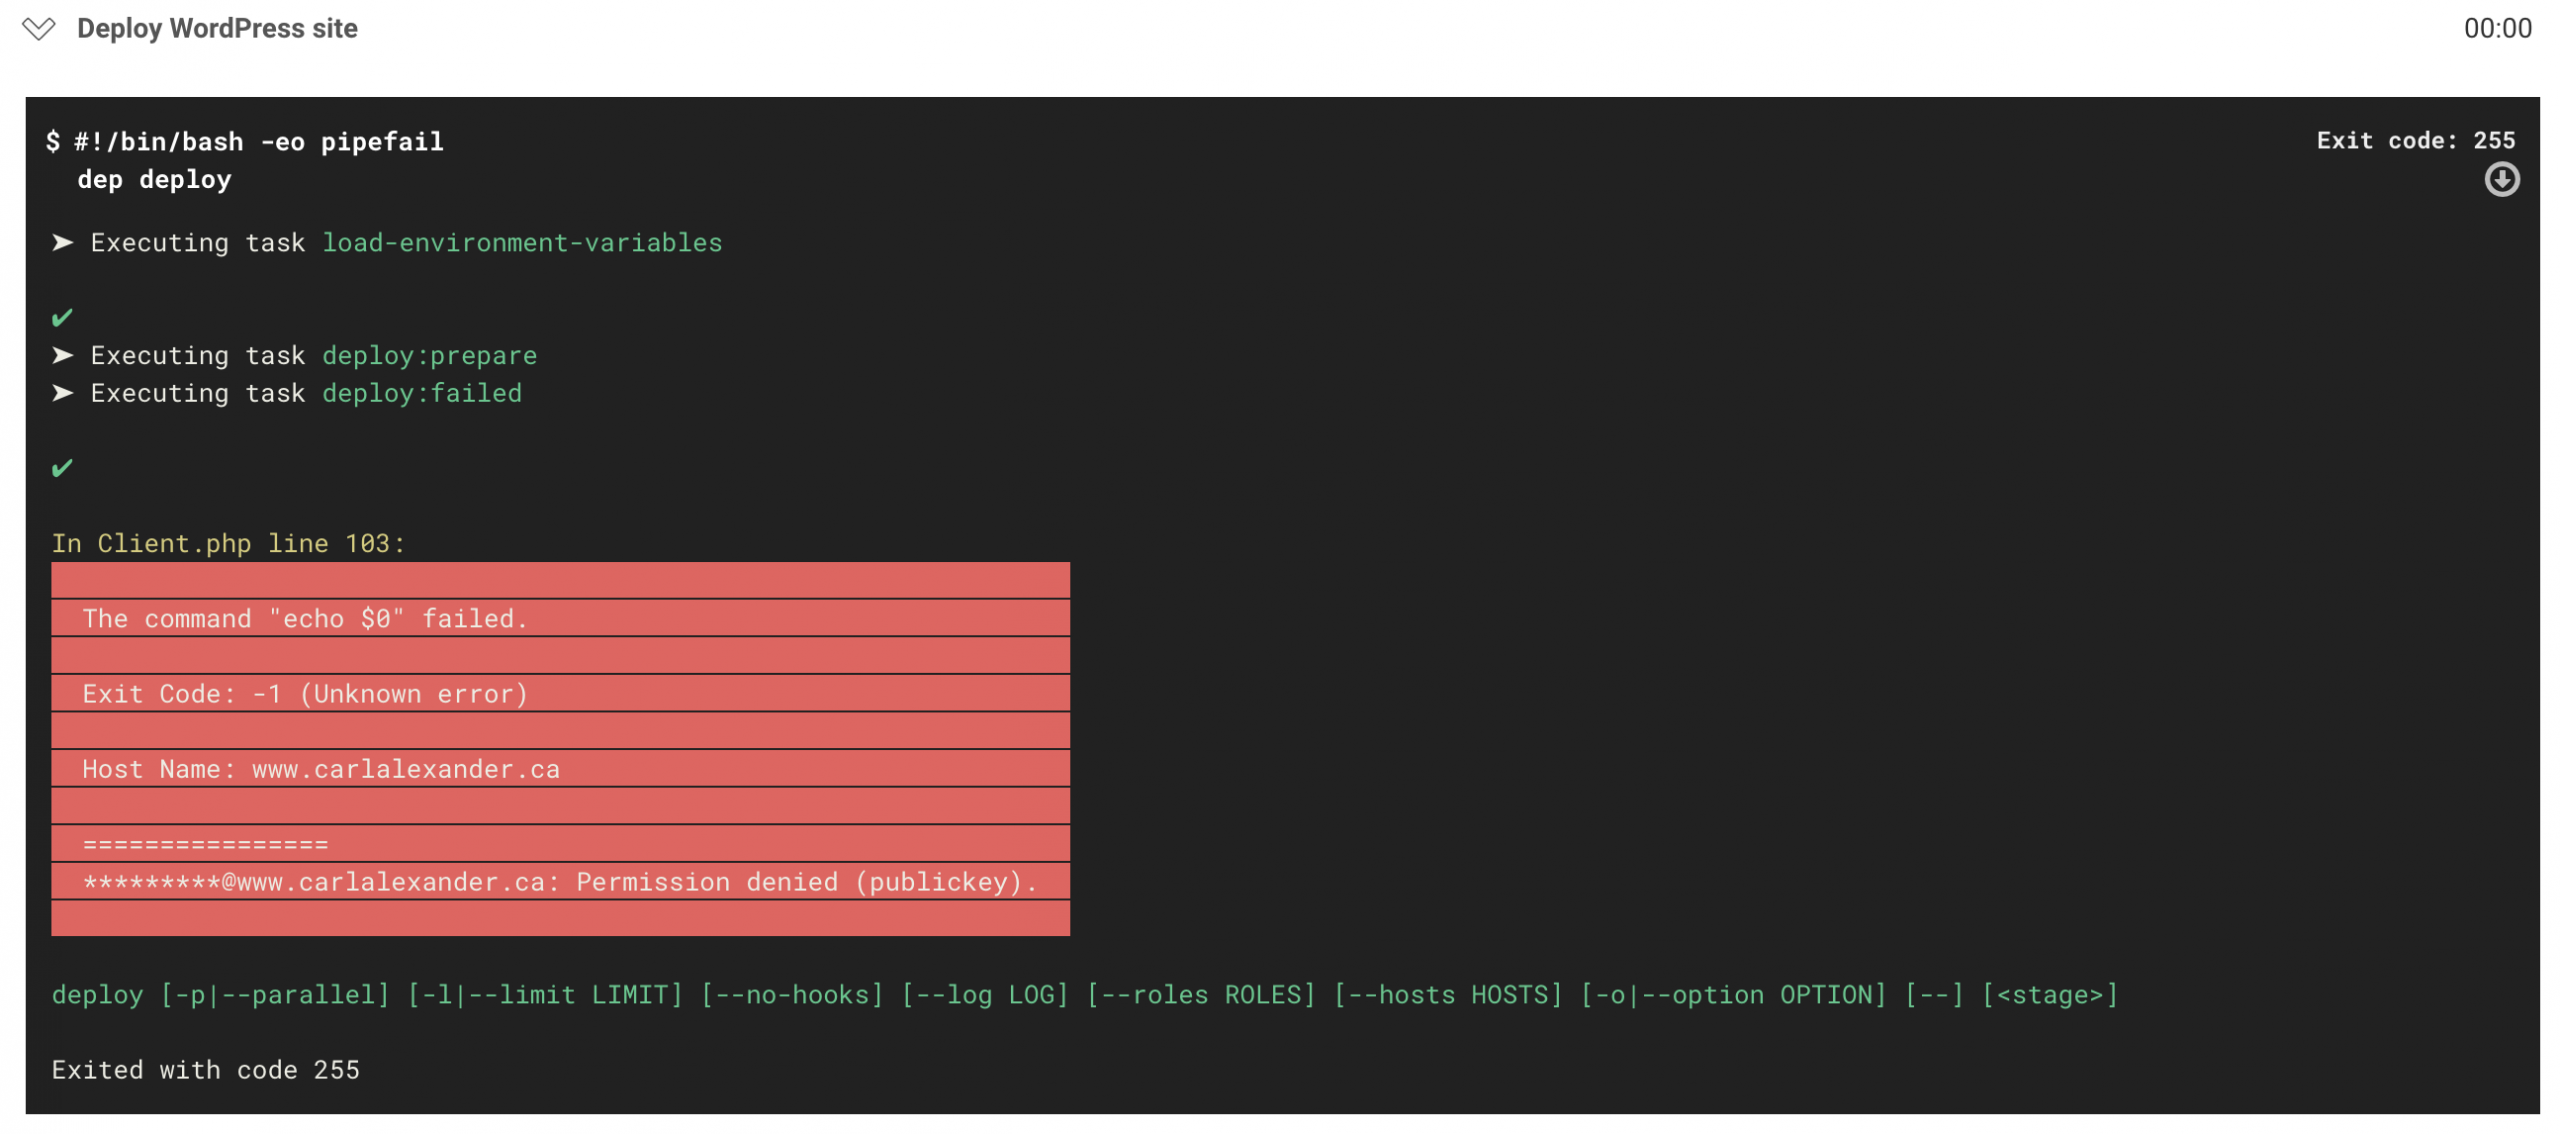
This is actually expected because we never gave CircleCI access to the server. To do that, we have to add the SSH key that we created earlier to the server. The difference is that we want to add the public key (the one with the .pub extension) to the server.
This step will vary depending on your hosting or server setup. If your host manages SSH keys through some UI, you need to add the public key there. If you have access to the server, you need to add it to the authorized_keys file.
Turn on automatic pull request merges
We’re down to the last step now! We have to go back to Dependabot and turn on automatic pull request merges. There are quite a few options to choose from. For the purpose of what we’re trying to do, you can leave most of them off.
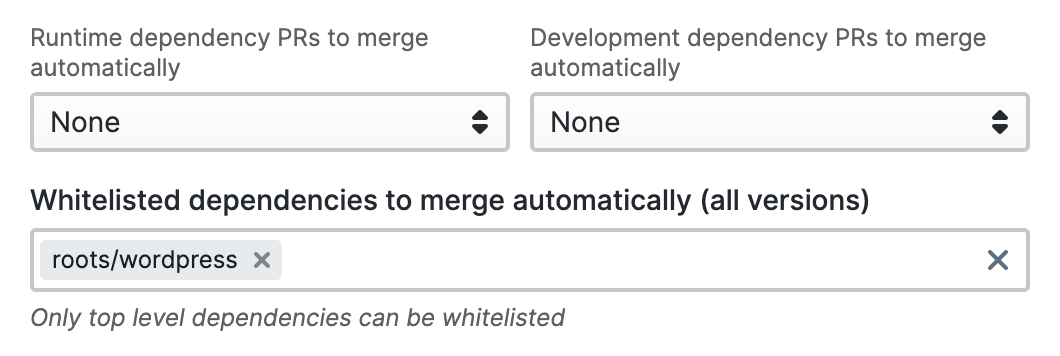
To ensure that only WordPress updates get merged automatically, you can use the whitelist option. You can see it in the screenshot above. Dependabot is only allowed to perform automatic pull requests merges for the roots/wordpress package.
One more thing
When I set this up initially, I thought that this would without any sort of testing. That said, I learned that, in practice, this isn’t quite the case. After turning on automatic pull request merges, I waited for WordPress to update in vain.
After some research, I found out that Dependabot won’t automatically merge pull requests that don’t have tests. This makes perfect sense, but it’s a bit annoying for this specific use case. So to fix this issue, we’re going to need to create another workflow in CircleCI.
Creating a testing workflow
The workflow that we’re going to create is a basic testing one. Bedrock already comes with a small test suite configured. So we’re going to create another workflow to run it whenever Dependabot creates a pull request.
version: 2
jobs:
  test:
    docker:
      - image: circleci/php:7.3
    steps:
      - checkout
      - run:
          name: Install dependencies
          command: composer install
      - run:
          name: Run tests
          command: composer test
workflows:
  version: 2
  test:
    jobs:
      - test
Above is the config.yml file with only the testing workflow. We check out the code and install the composer dependencies using composer install. We then run composer test to run the test suite. This is a custom command defined in the composer.json file here.
Unlike our deploy workflow, the test workflow doesn’t have any filters. This means that it won’t be limited to the master branch. It’ll also run on our pull requests, which is what we need for Dependabot to perform automatic merges.
And now we’re done!
Alright, so we’re done with the surprises. (I swear!) As you see here, Dependabot eventually merged the pull request. Once that happened, CircleCI deployed using the deploy workflow.
From this point on, I won’t need to worry about updating WordPress anymore. Dependabot and CircleCI will take care of it for me. That said, I have no plans to do the same for anything else at this time.
You can also find the complete config.yml file that I’m using below. While I know that my setup isn’t common for everyone, there should still be parts of that you can reuse. The only real requirement is to use Composer and Github.
version: 2
jobs:
  deploy:
    docker:
      - image: circleci/php:7.3
    steps:
      - checkout
      - run:
          name: Install deployer
          command: composer global require deployer/deployer:^6.4
      - run:
          name: Add Composer global bin folder
          command: echo 'export export PATH=$HOME/.composer/vendor/bin:$PATH' >> $BASH_ENV
      - run:
          name: Add WordPress server to known hosts
          command: ssh-keyscan -H www.carlalexander.ca >> ~/.ssh/known_hosts
      - run:
          name: Deploy WordPress site
          command: dep deploy
  test:
    docker:
      - image: circleci/php:7.3
    steps:
      - checkout
      - run:
          name: Install dependencies
          command: composer install
      - run:
          name: Run tests
          command: composer test
workflows:
  version: 2
  deploy:
    jobs:
      - deploy:
          filters:
            branches:
              only:
                - master
  test:
    jobs:
      - test